
Documentation
- Introduction
- Installation
- Updates
- Import Portfolios
- Export Portfolios
- General
- Setup Archives
- Customize Permalinks
- Change Image Sizes
- Multi-size
- Advanced Options
- Social Sharing
- Translations
- Styling
- Styles Import/Export
- Crete New Styles
- Style General
- Info & Alignment
- Filter & Pagination
- Style Ajax
- Colors & Typography
- Style Animations
- Style Query
- Style Skin
- Google Fonts
- Portfolio Items
- Portfolio Items Options
- New Portfolio Item
- New Gallery Item
- New Video Item
- New Audio Item
- New Link Item
- Insert Into Pages
- Shortcode
- Gutenberg Block
- Elementor Widget
- Visual Composer Widget
- Developers
- Introduction
- Theme Integration
- Add New Types & Styles
- Types & Styles Templates
- Generated CSS
- Javascript
Introduction
Viba Portfolio is an advanced portfolio plugin that helps you showcase your work beatifully. It's a complete portfolio solution with 60 included skins, 4 gallery types, YouTube, Vimeo & self-hosted videos, soundcloud & self-hosted audios, 3 pagination types, 3 filter types, 3 ajax types and many more awesome features.
If there is something that isn't in the documentation or isn't clear to you please open a support ticket.
If your portfolio items are breaking your theme layout there is a way to fix that.
Installation
Downloading from CodeCanyon and unziping it, you will find the following files:
- viba-portfolio.zip - actual plugin
- documentation.html - plugin documentation
- changelog.html - plugin changelog
- demo-content.xml - import demo content
To install the plugin follow these steps below.
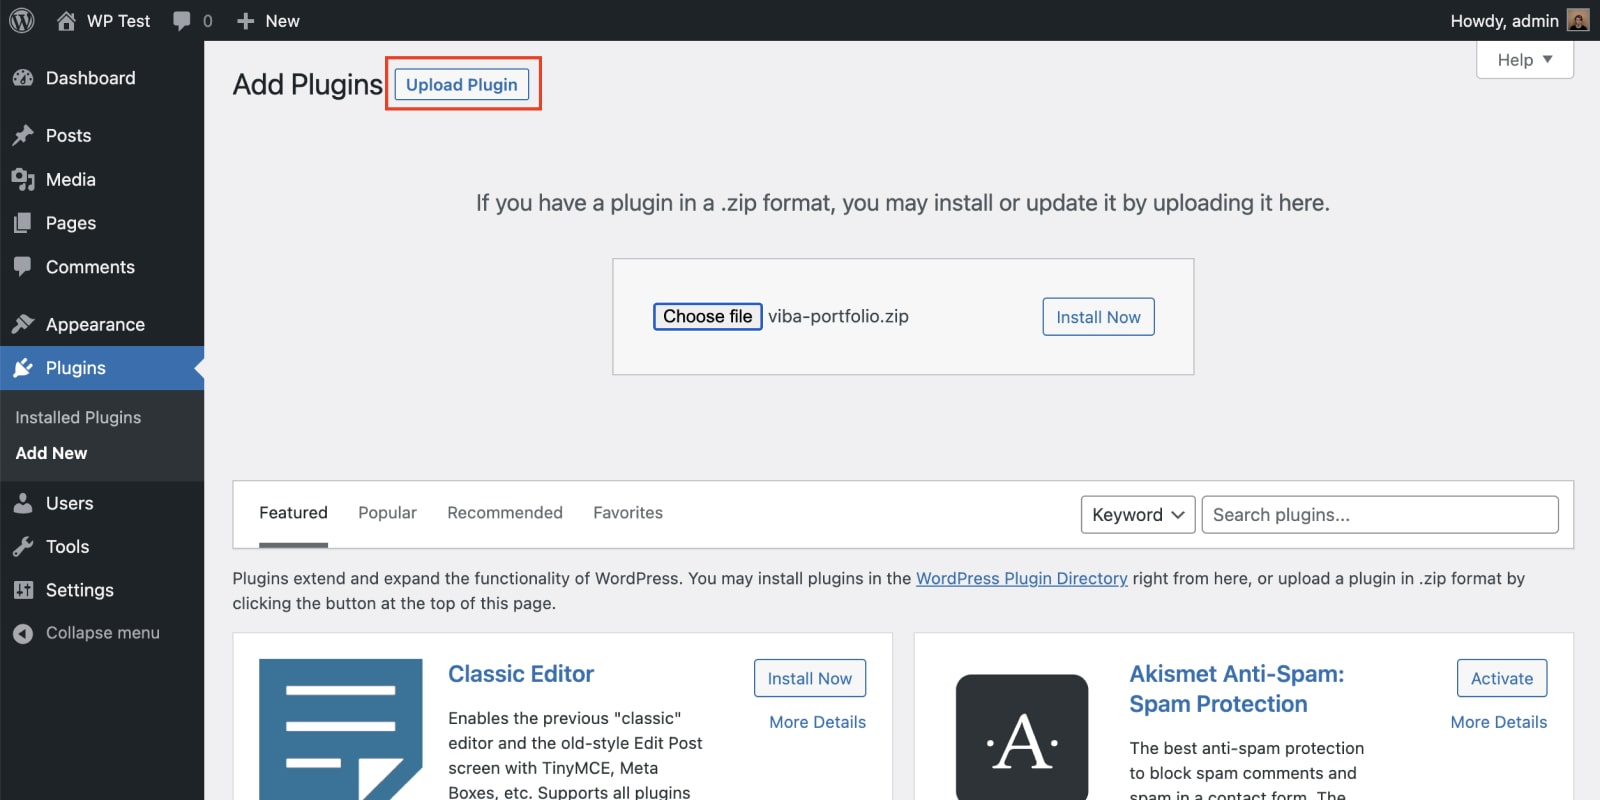
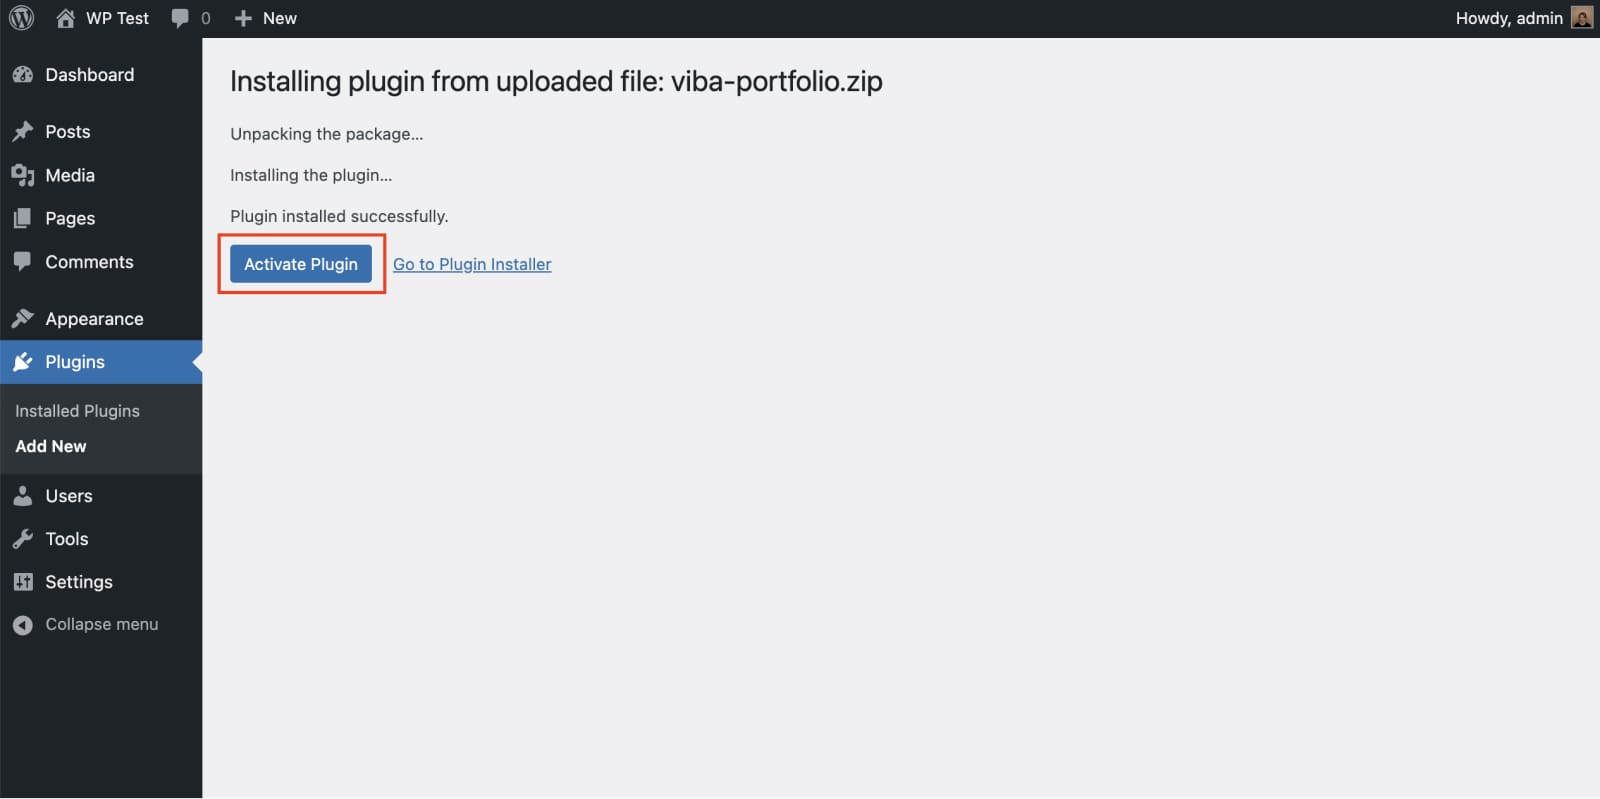
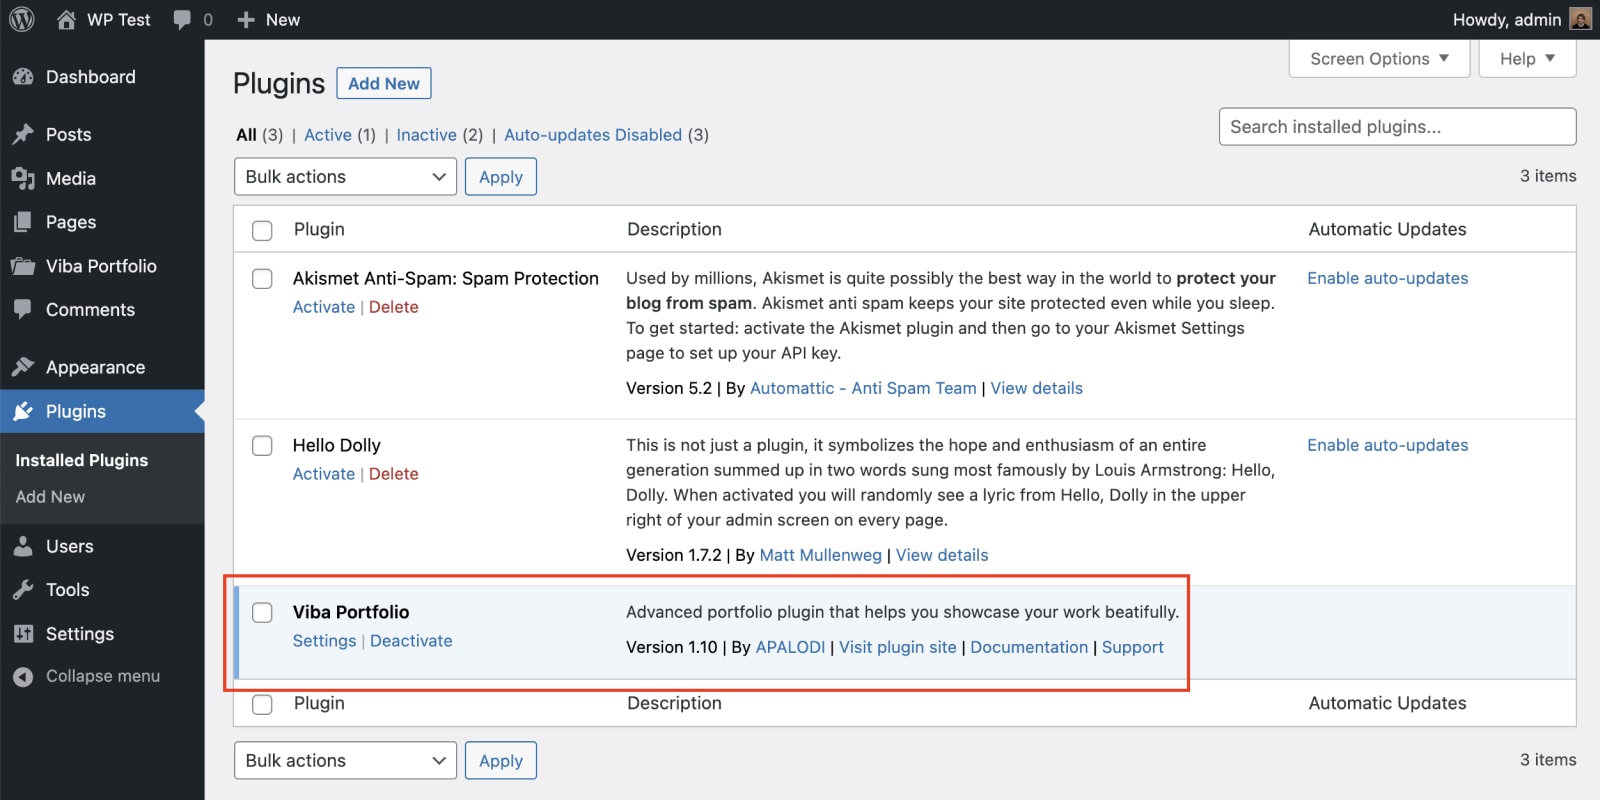
And that's it! You've successfully installed Viba Portfolio.
Updates
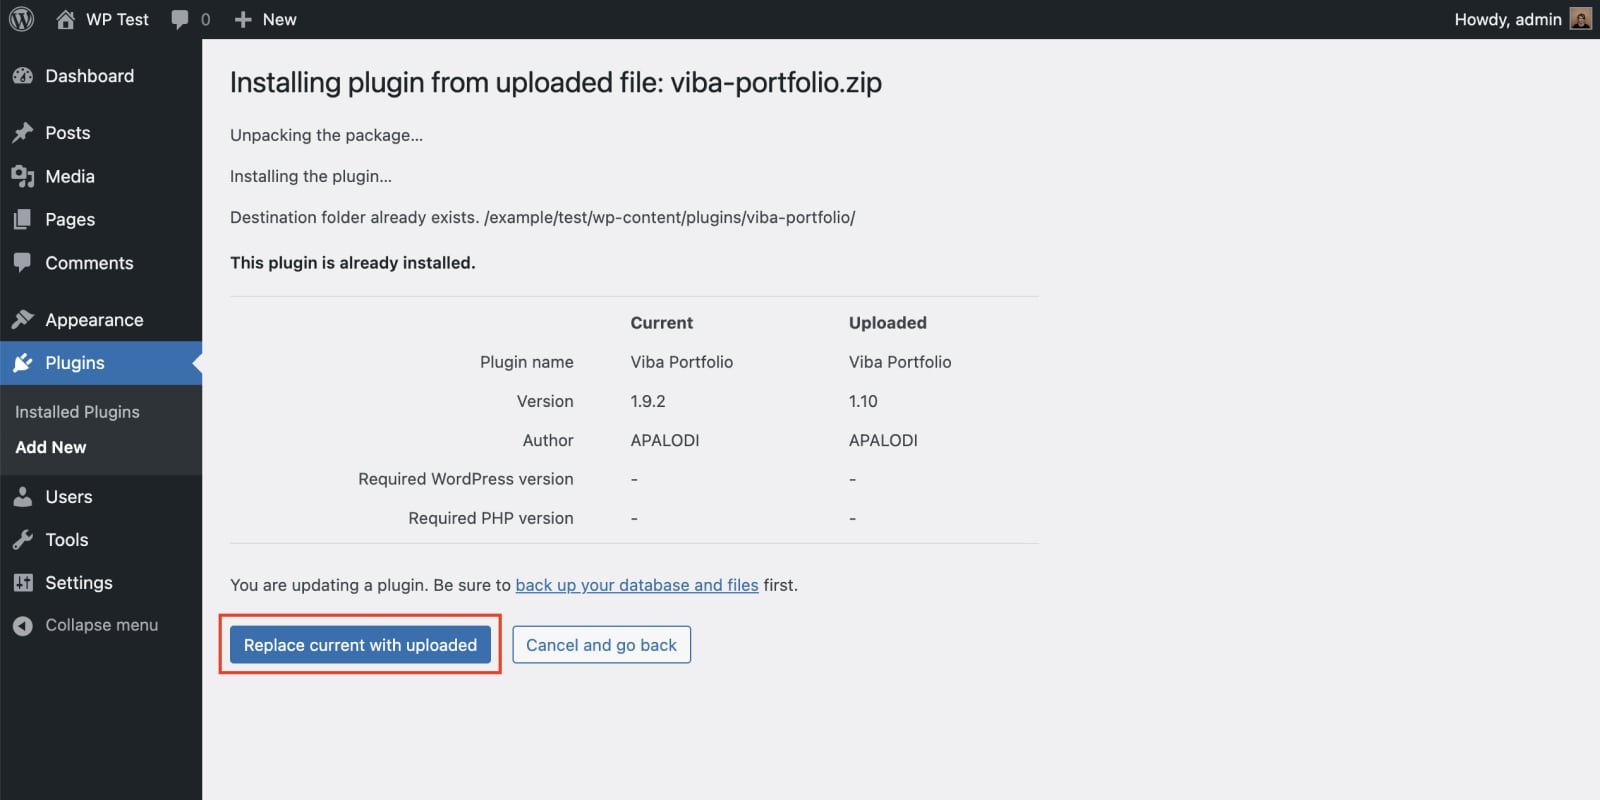
To update a plugin just repeat the same process as with installation and WordPress will recongize that a plugin is already installed and it will give you option to replace current version with new uploaded one.
Import Portolios
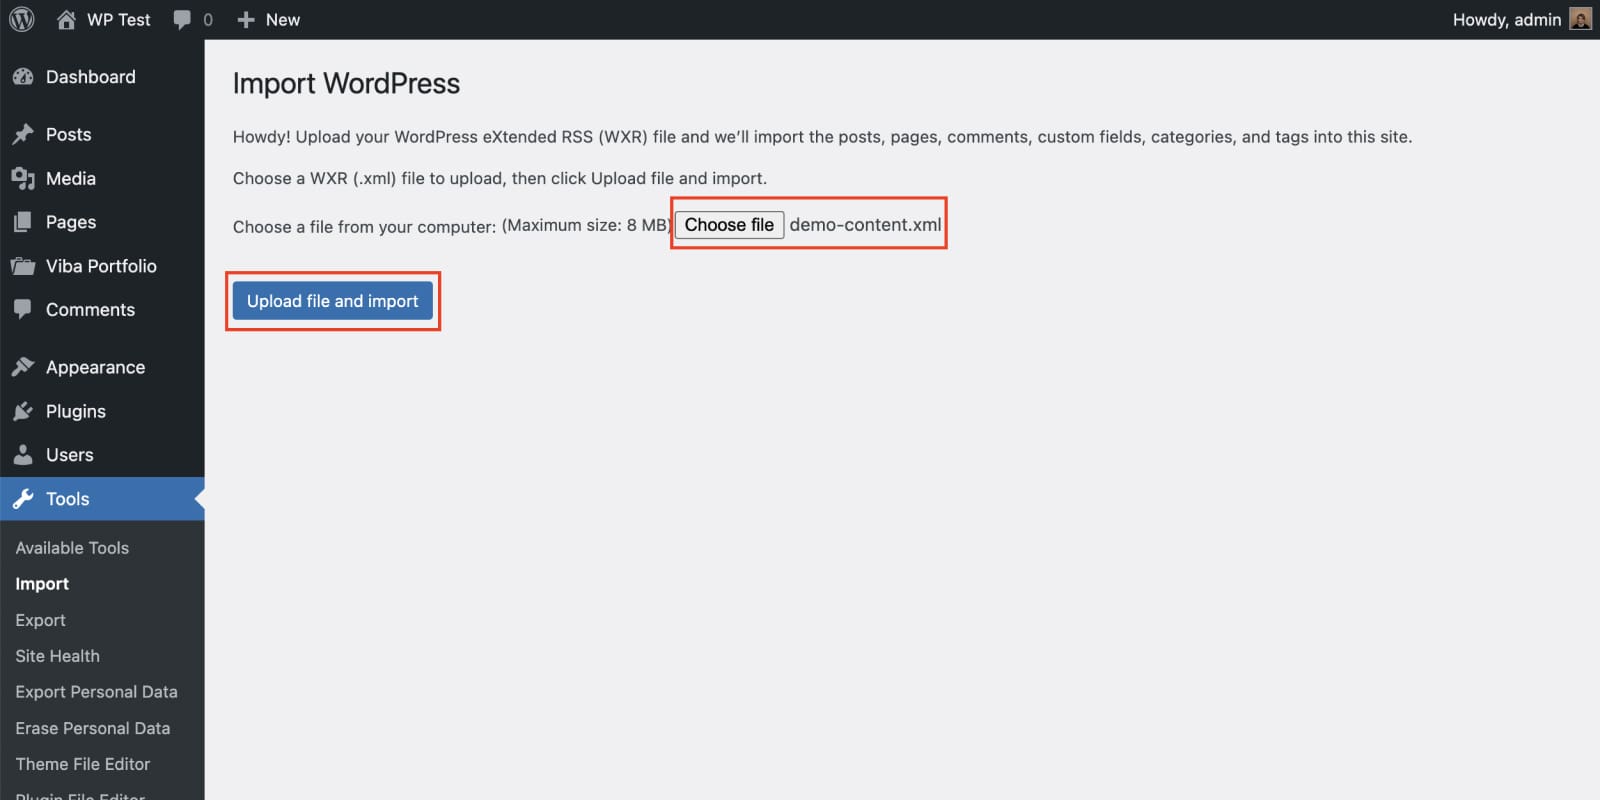
To import your portfolios you need to use the WordPress default import option. We will show you how to import our demo-content example. Demo content provides you with few portfolio items to jumpstart your plugin testing. To install the demo content follow these steps.
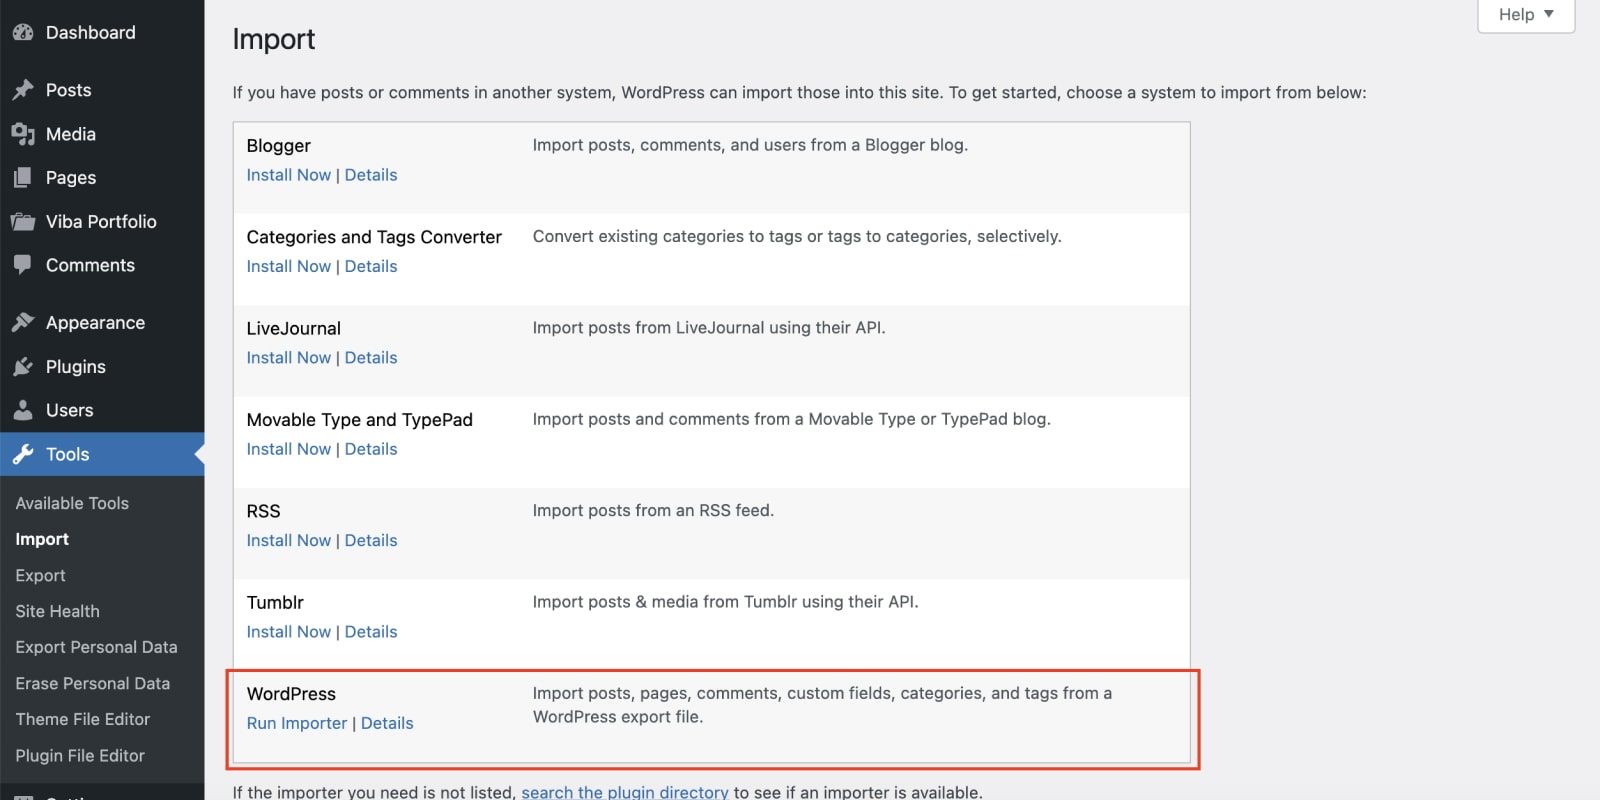
Select the demo-content.xml and run "Upload file and import".
Choose to import attachments also.

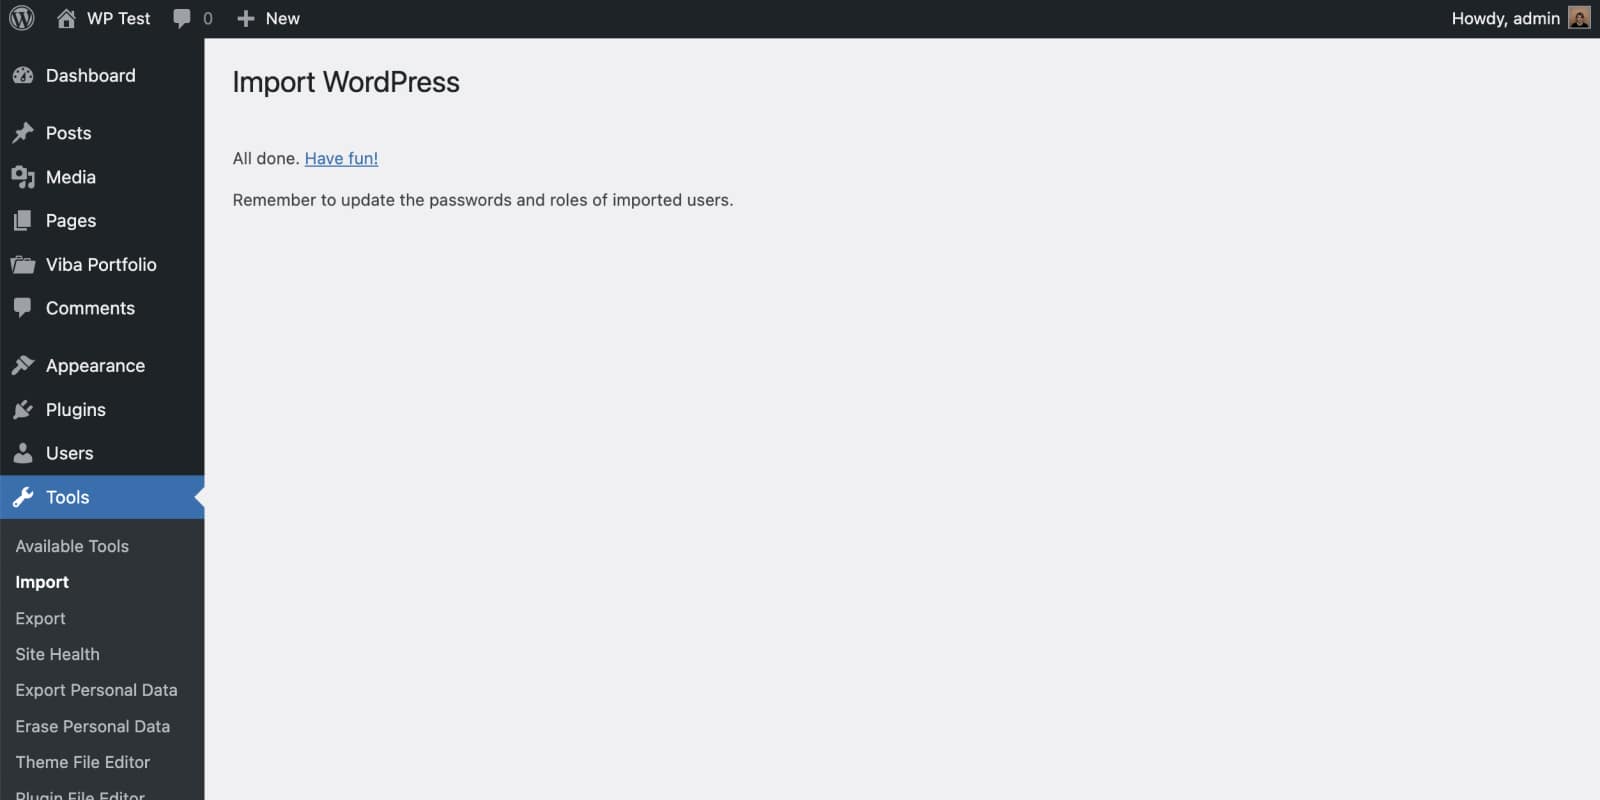
If everything was successful you will see this meessage.
Export Portolios
There are 2 ways you can export your portfolios.
- WordPress Default Export - built-in export option
- Viba Portfolio Export - custom export option
WordPress Export
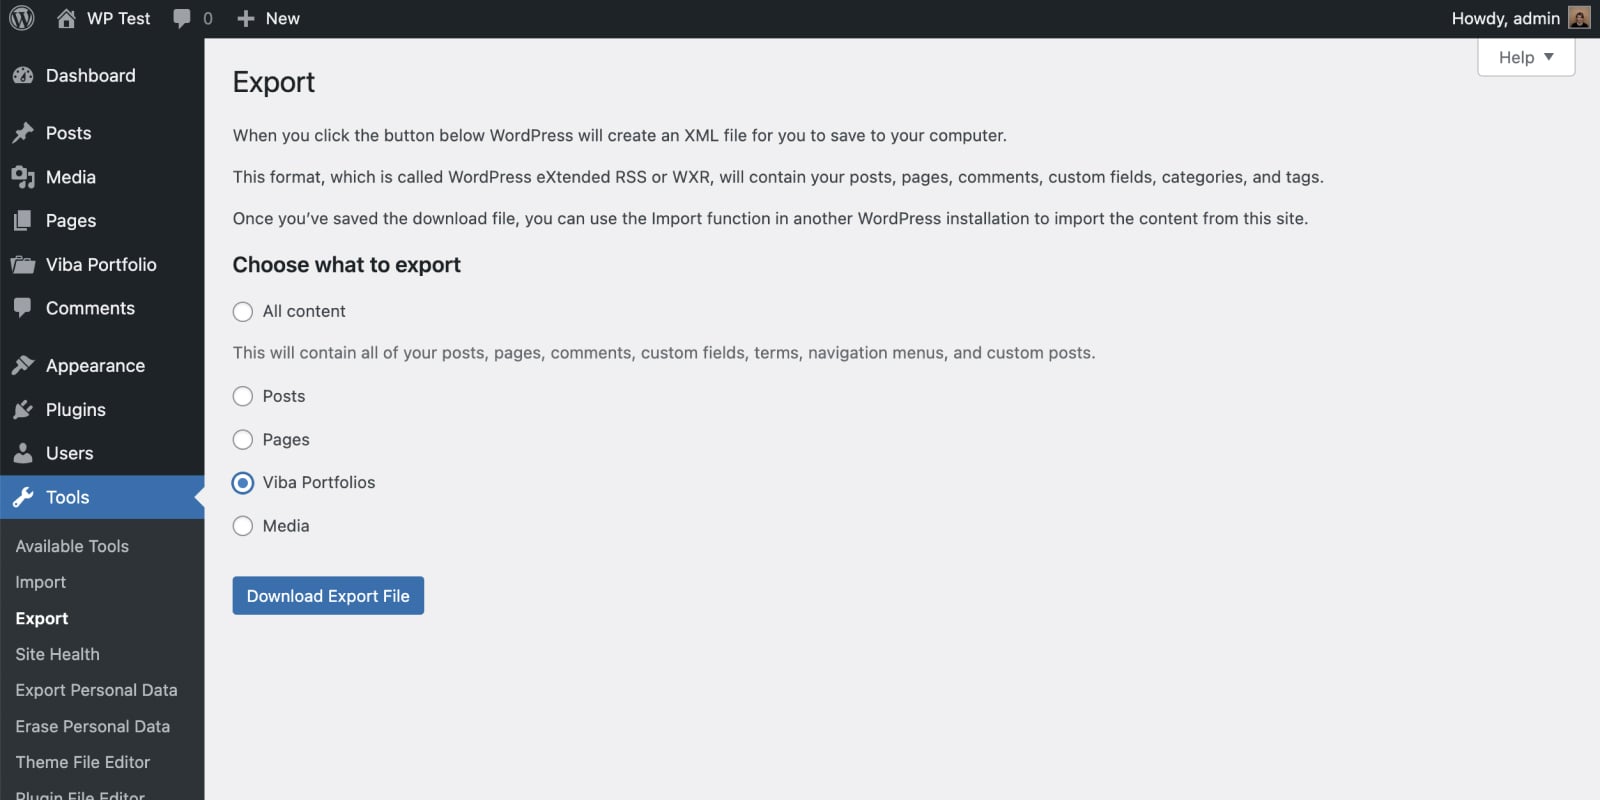
Every media you upload to wordpress is stored as a post type attachment. If you would go and export your items through wordpress default export option you wouldn't export your images, video and audio files because you are exporting only one post type, your portfolios. This option is good if for some reason you don't want your media exported.
You could use the option "All content" but it will export everything (posts, pages, media...).
Viba Portfolio Export
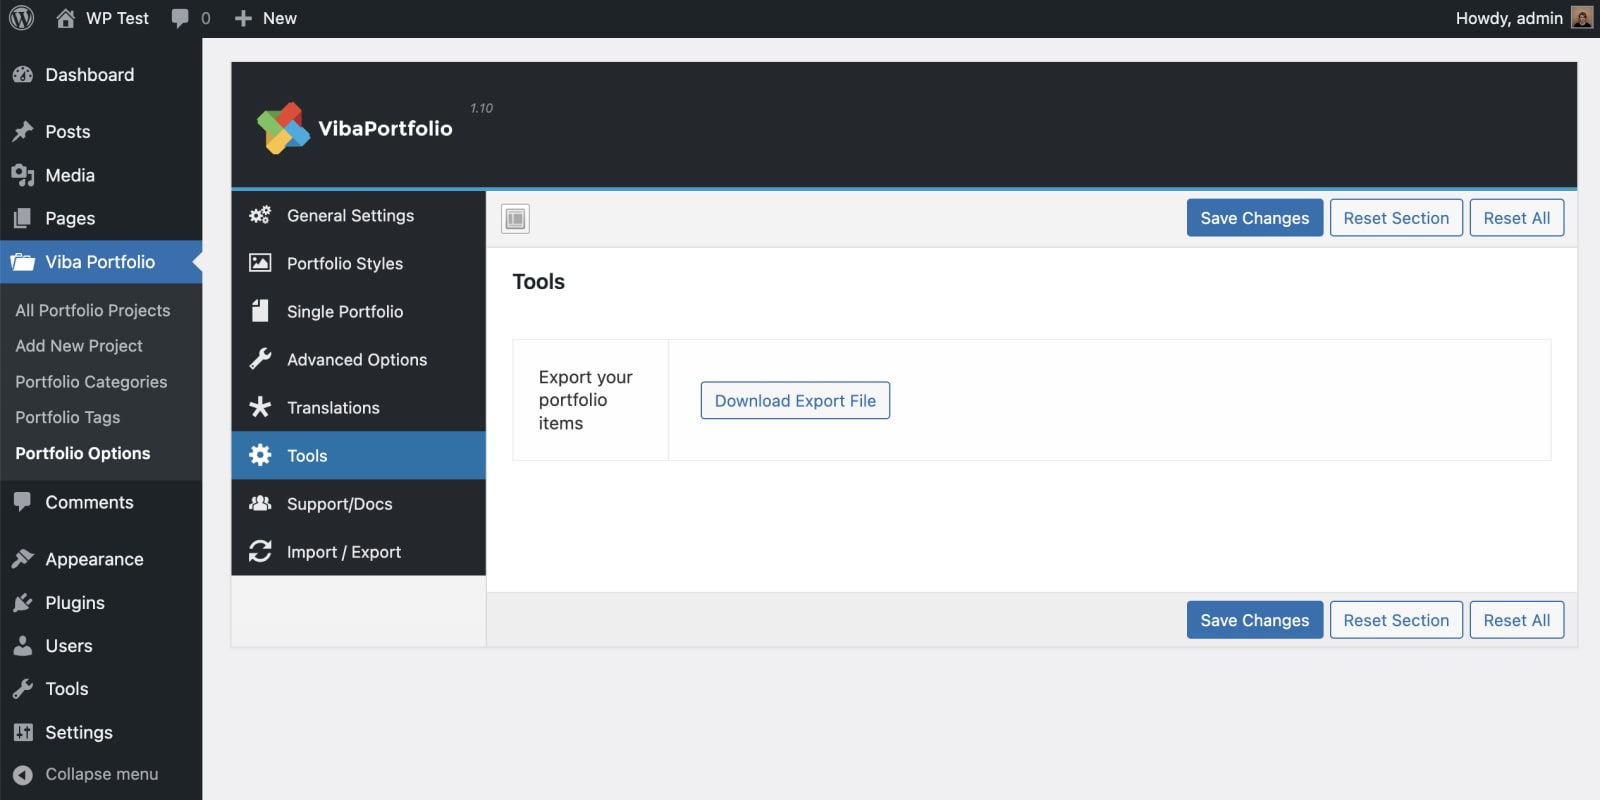
Under Tools is a custom export option. This way you will export all your portfolio items and all media files that are connected to your portfolios (featured images, gallery images, video and audio files).
Setup Archives
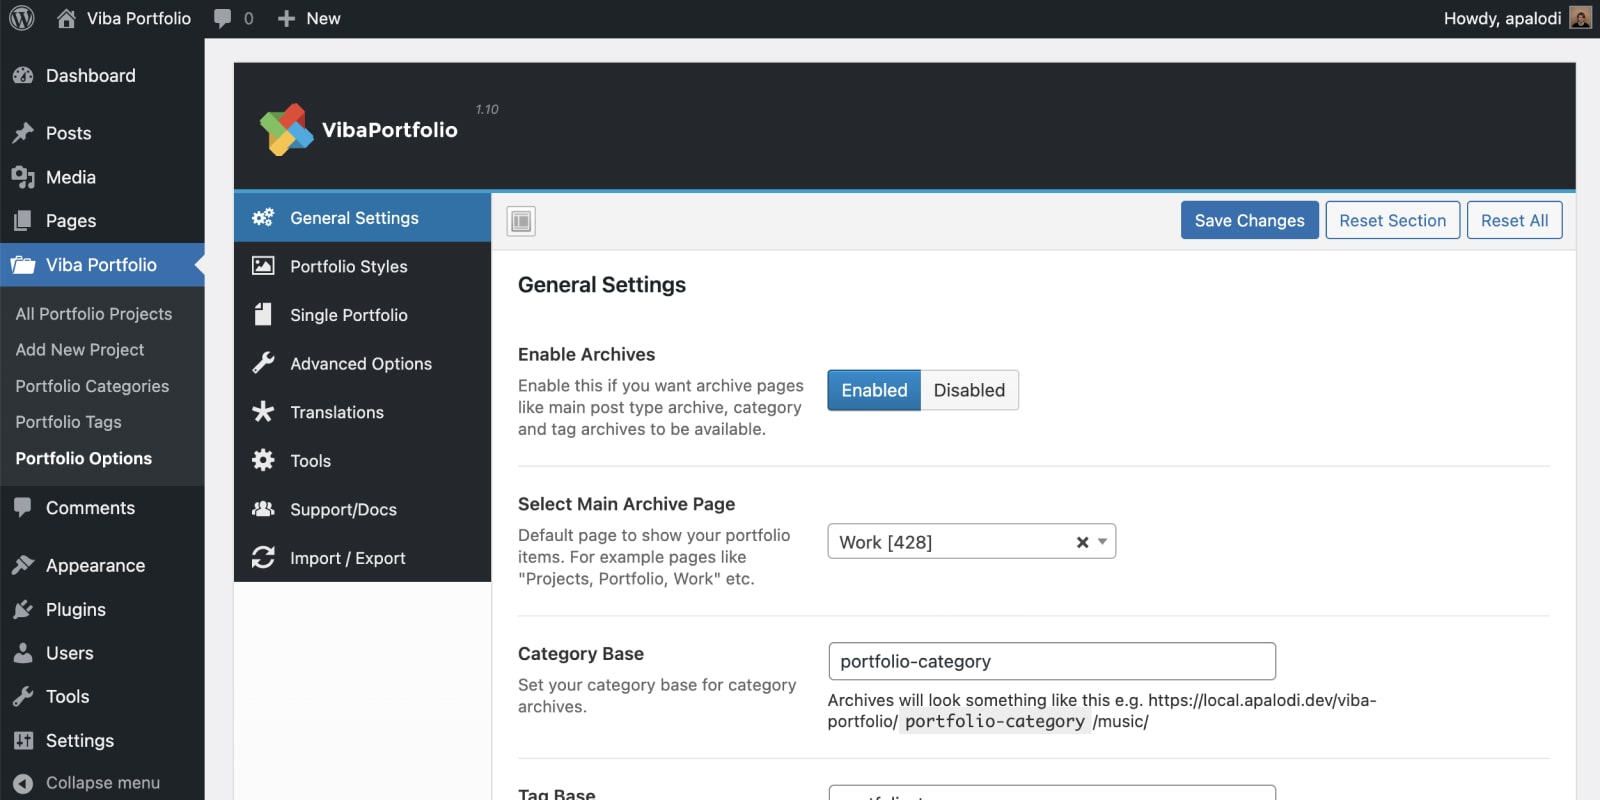
After you activate Viba Portfolio you will see a new menu called "Viba Portfolio". Under that menu is a submenu called "Portfolio Options".
If you enable archives you will get 3 new options.
- Archive Page - You need to create a new page first and then select it here. This is the page that will show all your portfolio items.
- Category Base - Category base is used for nice url
- Tag Base - Tag base is used for nice url
Archives are optional. If you don't want them you can use the shortcodes to show portfolio items.
Customize Permalinks
You can easy change permalinks used for Viba Portfolio.
If your archive page is called e.g. "Projects" and you are using the default permalinks then your single projects will have a url something like this http://example.com/projects/my-project. They will automatically be given the archive page base name.
If you want to use categories /projects/%viba_portfolio_category%/. This will give you something like this http://example.com/projects/my-category/my-project
If you don't want to use the archive page you can still have the projects base for you portfolio items. You need to to enter it into the text field like so /projects/
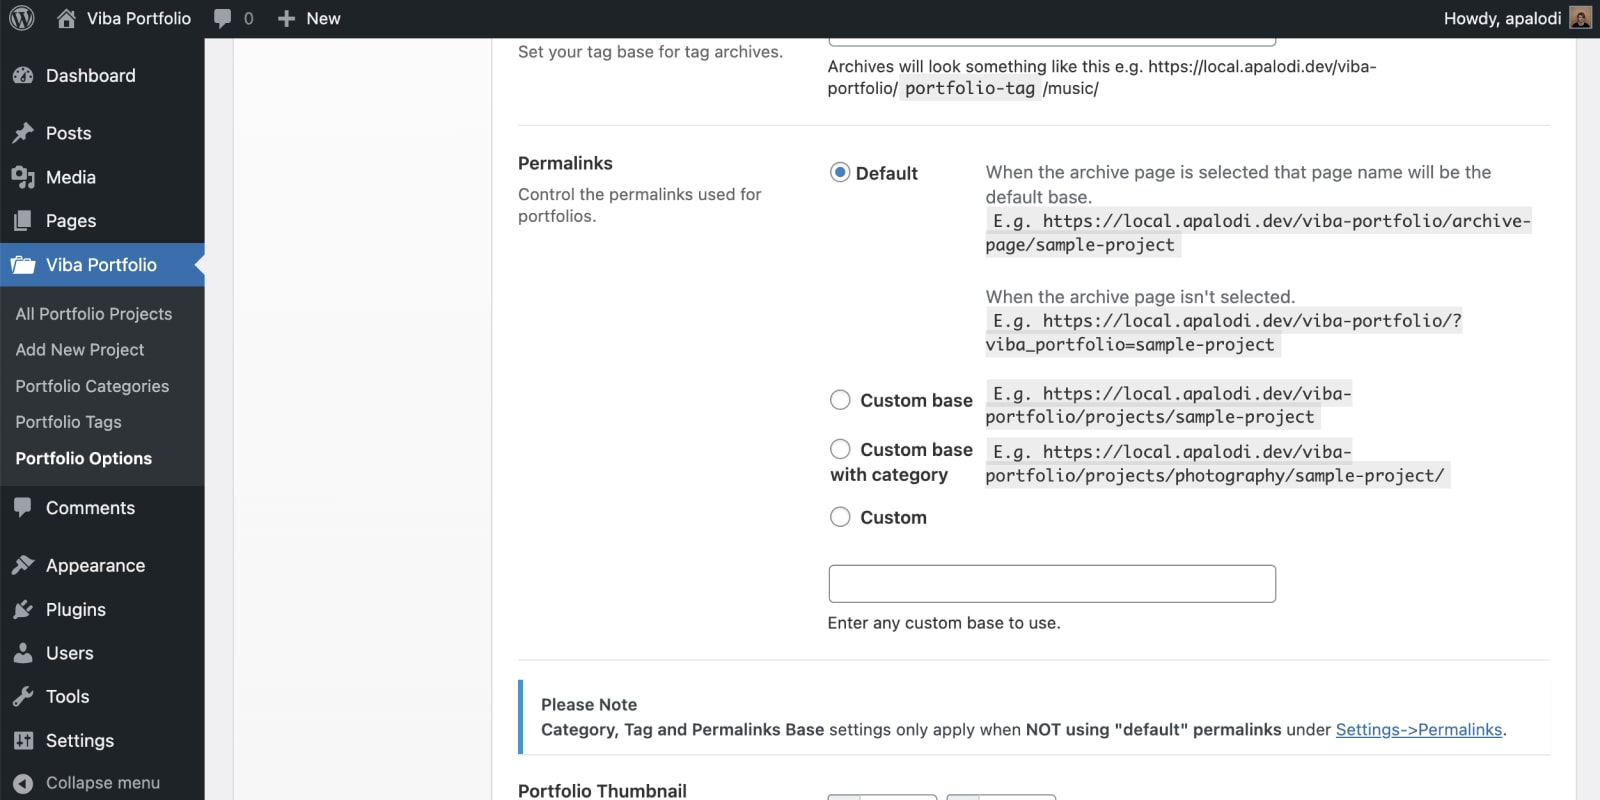
At this moment you can't have only /%viba_portfolio_category%/ for permalinks. It will give you 404 errors.
Change Image Sizes
Enable Multi-Size if you want additional image sizes that will be used for portrait, landscape and big items.
Entering 0 as width or height, with hard crop disabled, will give you auto height or auto width images keeping the aspect ratio.
If you want masonry layout enter 0 for Portfolio Thumbnail height with hard crop disabled.
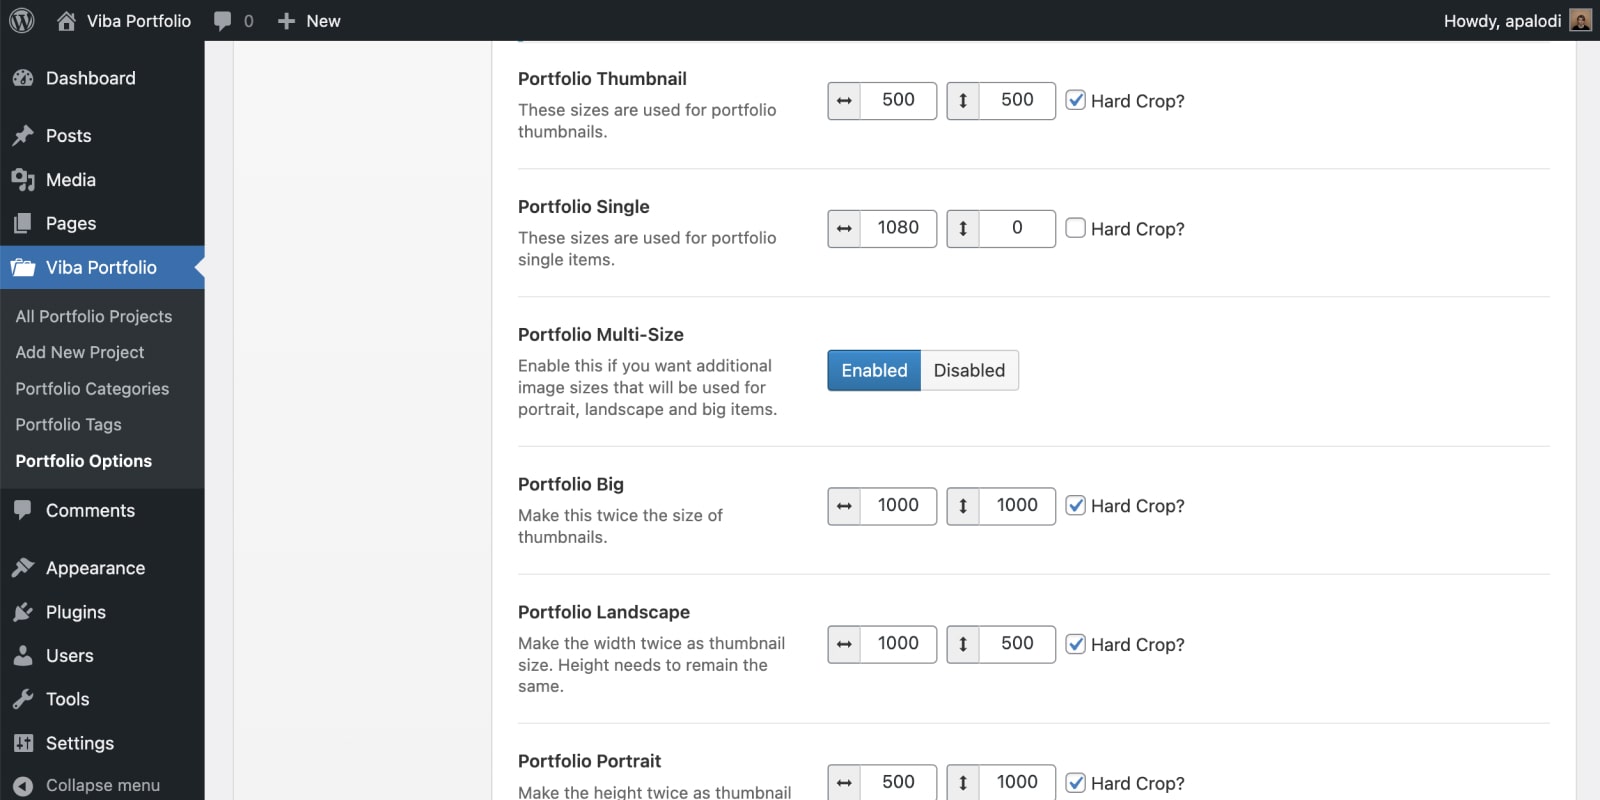
After changing these settings you may need to Regenerate Thumbnails.
Multi Sizes
Enable Multi-Size if you want additional image sizes that will be used for portrait, landscape and big items.
If you want have margins with multi-size grid you will need to adjust the image sizes. E.g. if we have 20px margins we need to make our images by 20px smaller.
- Portfolio Big - 1000x1000px
- Portfolio Thumbnail - 480x480px
- Portfolio Landscape - 1000x480px - the width is the same as Portfolio Big and the height is smaller by 20px
- Portfolio Portrait - 480x1000px - the height is the same as Portfolio Big and the width is smaller by 20px
After changing image sizes you will need to regenerate your thumbnails.
Advanced Options
Please be very careful when using some of these options.
Enable "Delete Data On Uninstall" and "Delete Data On Deactivation" only if your are completely sure what you are doing and you want to delete all data from this plugin.
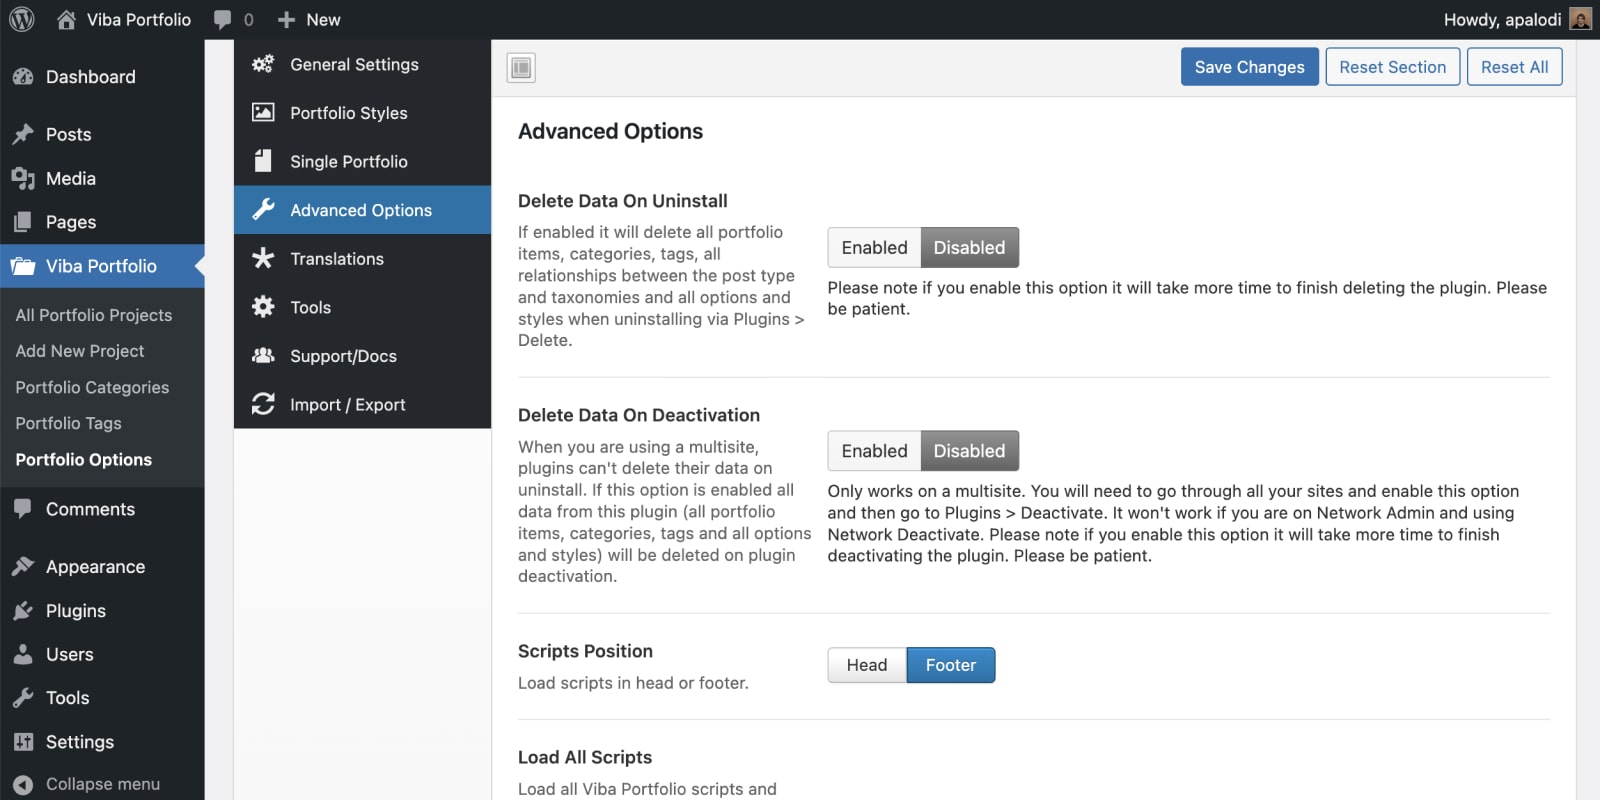
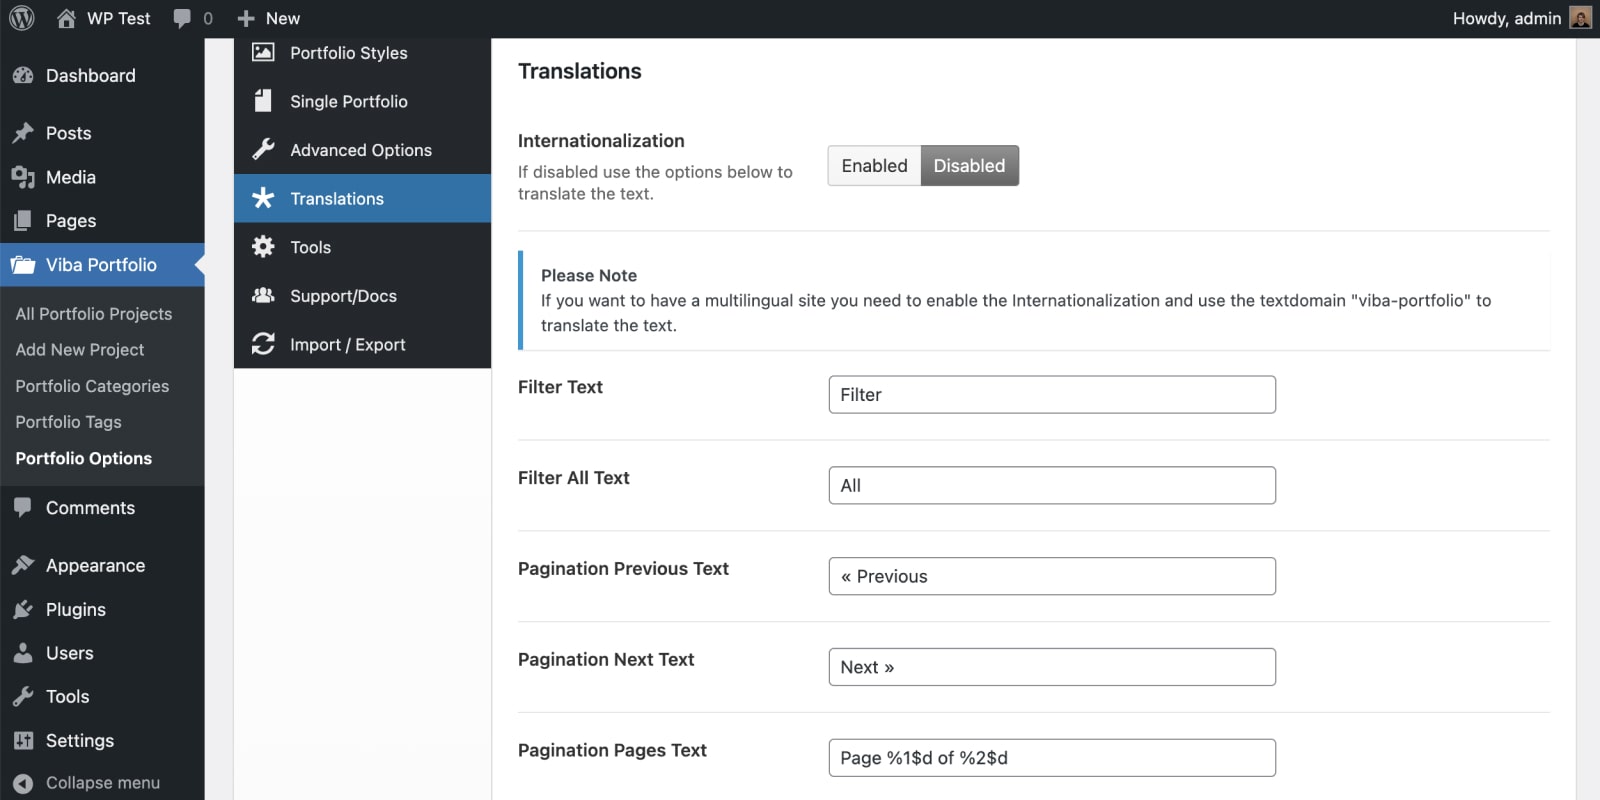
Translations
You have an easy option to change all the default text used on the frontend. If you want to have a multilingual site you need to enable the Internationalization and use the textdomain viba-portfolio to translate the text.
Style Import/Export
There are options to export and import styles. Export is generating a file that it will be downloaded and to import a style you need to copy paste the exported style code into the are for import.
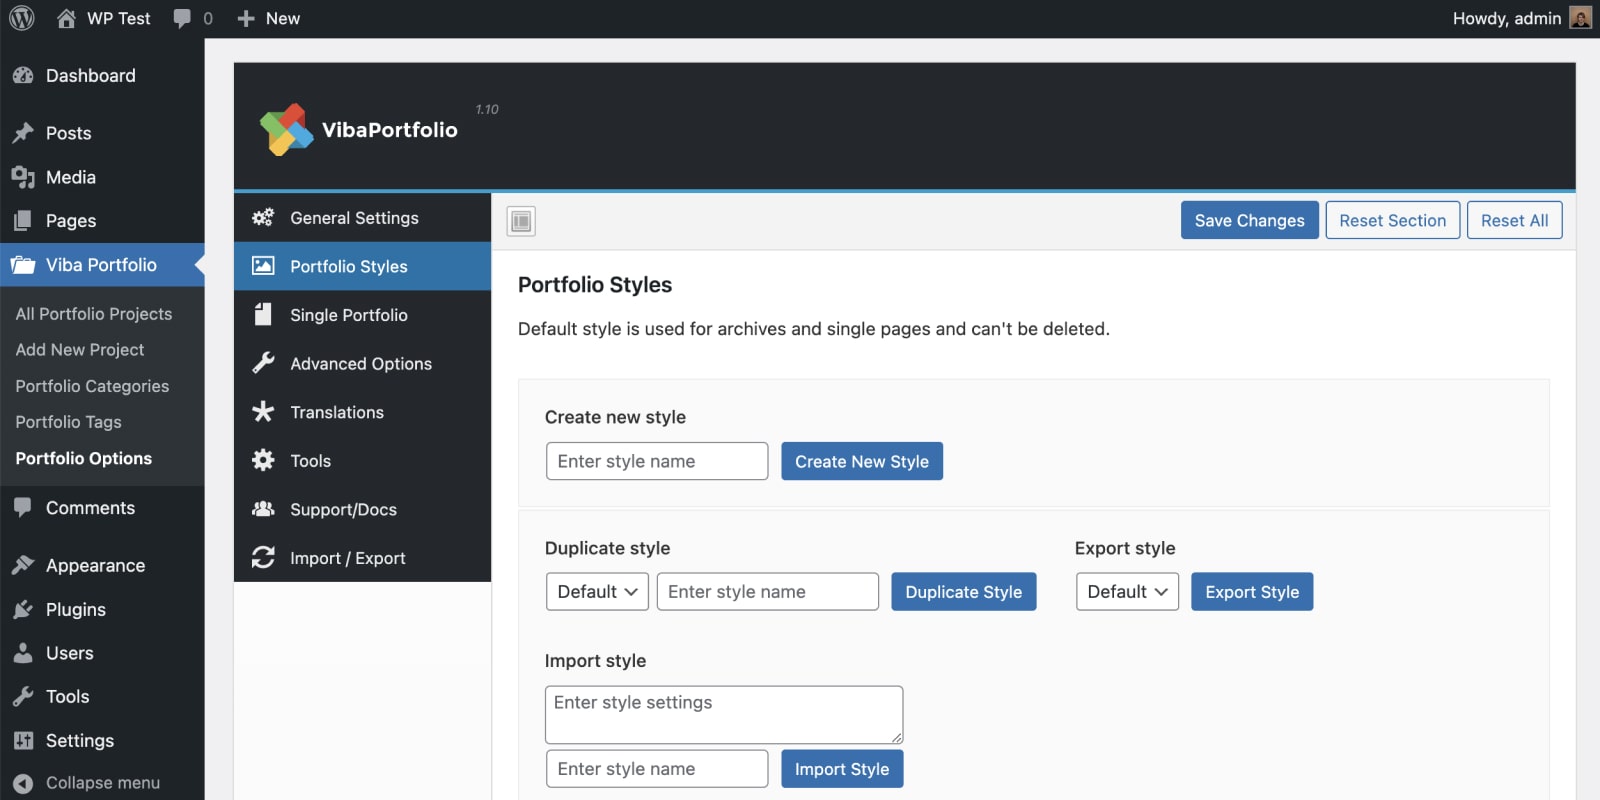
Create New Style
Default style is used for archives and single pages and can't be deleted.
Under Portfolio Styles enter your new style name and then click "Create New Style".
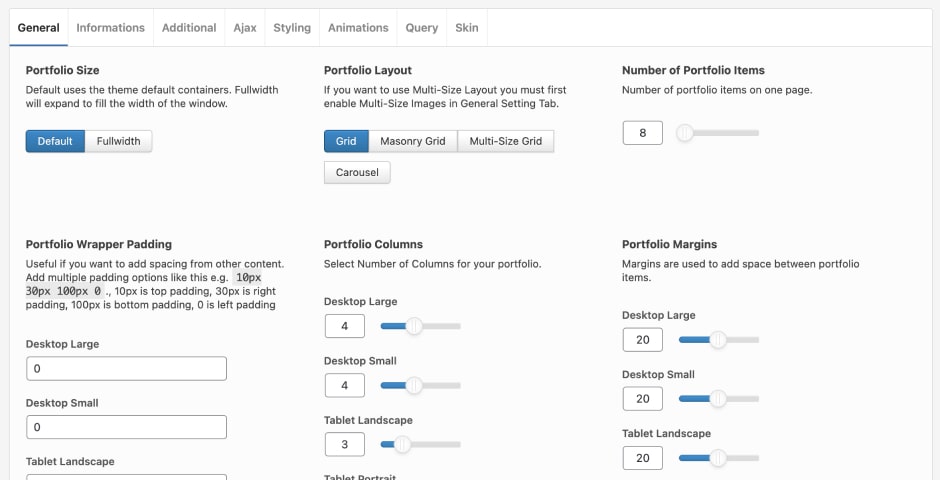
Style General Options
General options available here are:
- Size - do you want to use default theme containers or do you want to make the it fullwidth.
- Layout - Choose between 3 available layouts.
- Number - Number of portfolio items on one page.
- Padding - Add padding to the wrapper.
- Columns - Select columns for multiple sizes.
- Margins - Select marginss for multiple sizes
Multi-size grid layout by default won't fit perfectly if you use margins. Check out multi-size grid with margins.
Info & Alignment
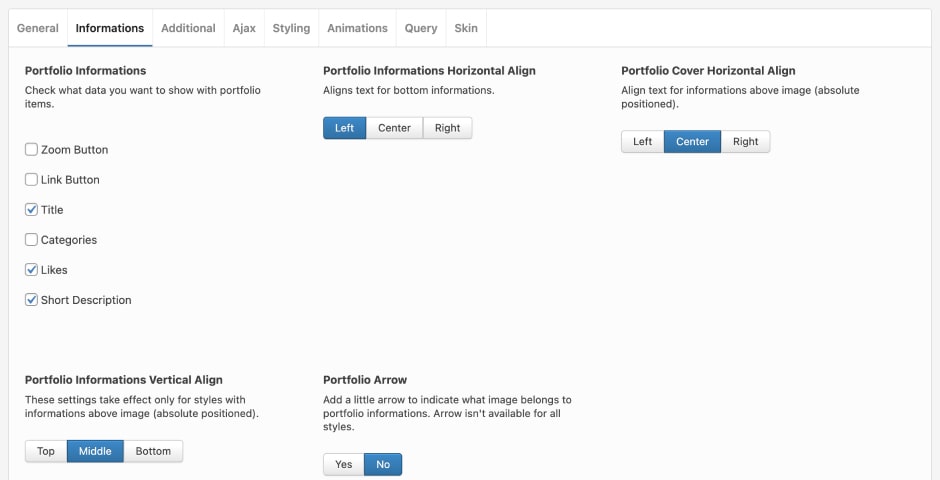
Easy select what informations do you want to enable and how do you want them to be aligned.
- Informations - Check what data you want to show with portfolio items.
- Horizontal Align - Aligns text for bottom informations
- Cover Horizontal Align - Align text for informations above image (absolute positioned).
- Vertical Align - These settings take effect only for styles with informations above image (absolute positioned).
- Arrow - Add a little arrow to indicate what image belongs to portfolio informations.
Filter & Pagination
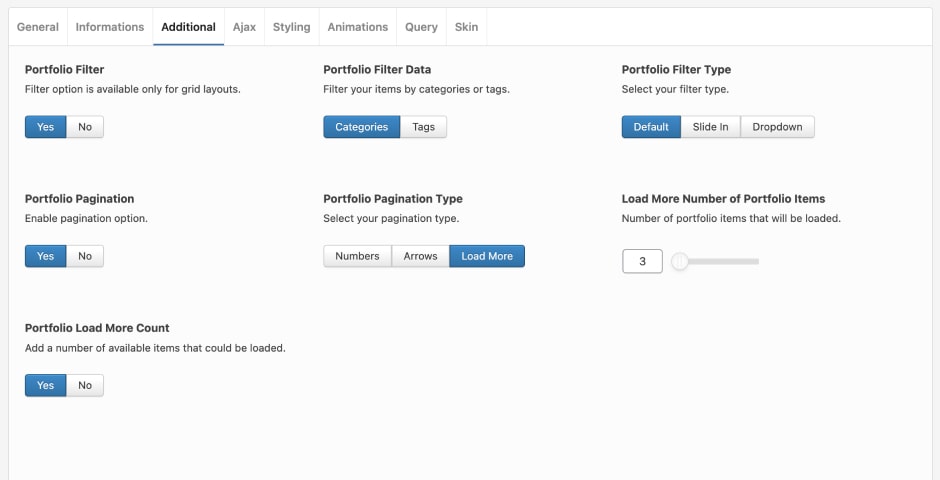
Add filter and pagination.
- Filter - Adds a option to filter your items by your filter data.
- Filter Data - Filter your items by categories or tags.
- Filter Type - Choose between 3 types
- Pagination - Adds a pagination at the end of your portfolios.
- Pagination Type - Choose between 3 types
- Load More Number - Number of portfolio items that will be loaded.
- Load More Count - Add a number of available items that could be loaded.
Style Ajax
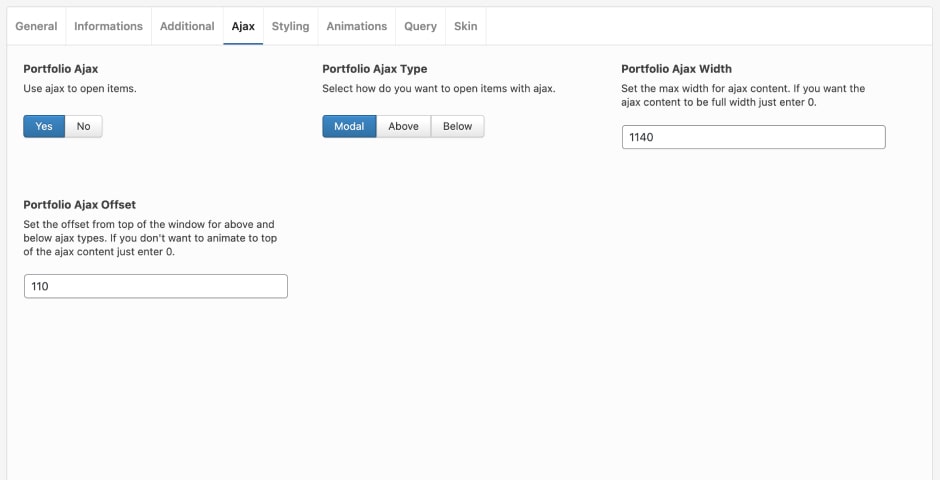
Ajax enables you to load your items without going to another page.
- Ajax - Use ajax to open items.
- Ajax Type - Select how do you want to open items with ajax.
- Ajax Width - Set the max width for ajax content. If you want the ajax content to be full width just enter 0.
- Ajax Offset - Set the offset from top of the window for above and below ajax types. If you don't want to animate to top of the ajax content just enter 0.
Colors & Typography
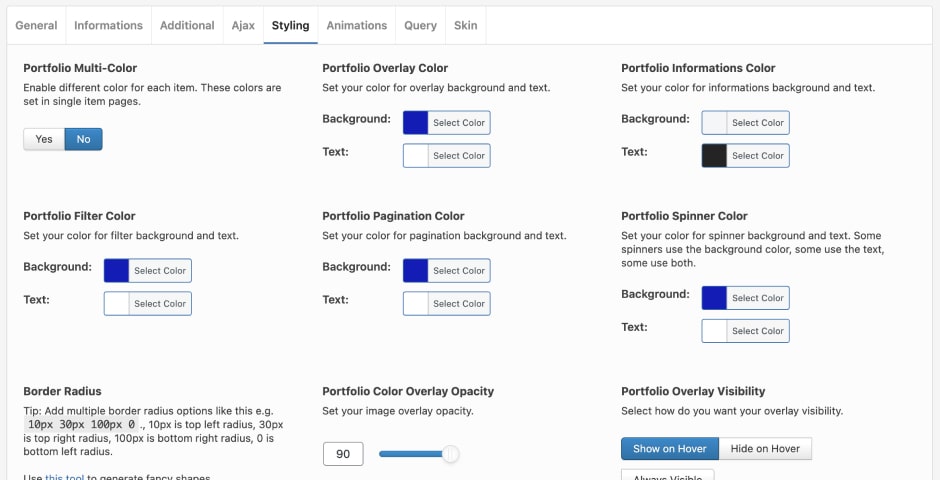
Easy change styling to match your desire using these options.
- Multi-Color - Enable different color for each item. These colors are set in single item pages.
- Custom Colors - Set your custom colors for overlay, informations, filter, pagination and spinner.
- Overlay Opacity - Image overlay opacity.
- Overlay Visibility - Select how do you want your overlay visibility.
- Typography - Change typography for title, likes, categories, description, filter and pagination.
- Custom CSS - Input your custom CSS.
Style Animations
Animations bring life to your portfolio items. You can chooose from:
- Hover Effect - Set your hover overlay effect.
- Hover Animations - Set portfolio hover animations.
- Loading, Filtering and Carousel Animations
- Animation Duration - This duration apply only to Loading, Filtering and Carousel Animations.
- Portfolio Spinner - Select portfolio spinner.
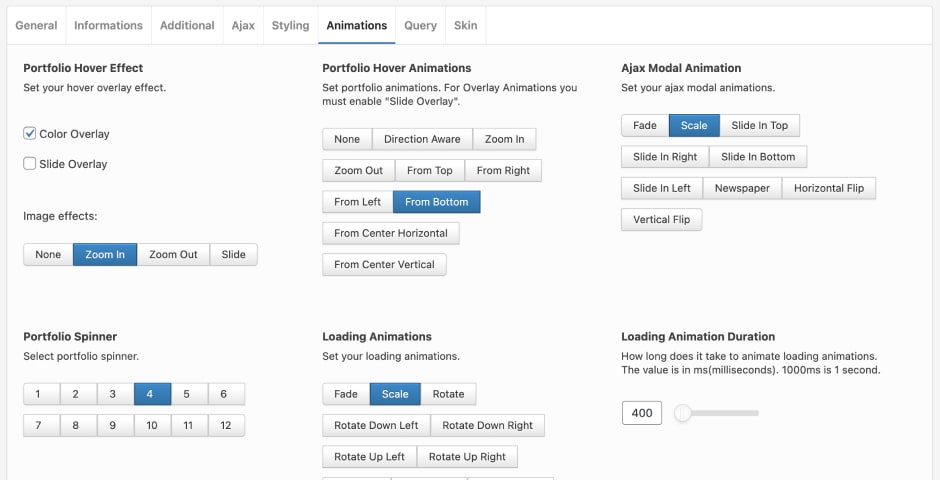
Style Query
Query options give you a way to easy select exactly what portfolio items do you want to show. You can query your items by:
- Categories
- Tags
- Order
- Author
- Post Format
- Year and month
- Relation
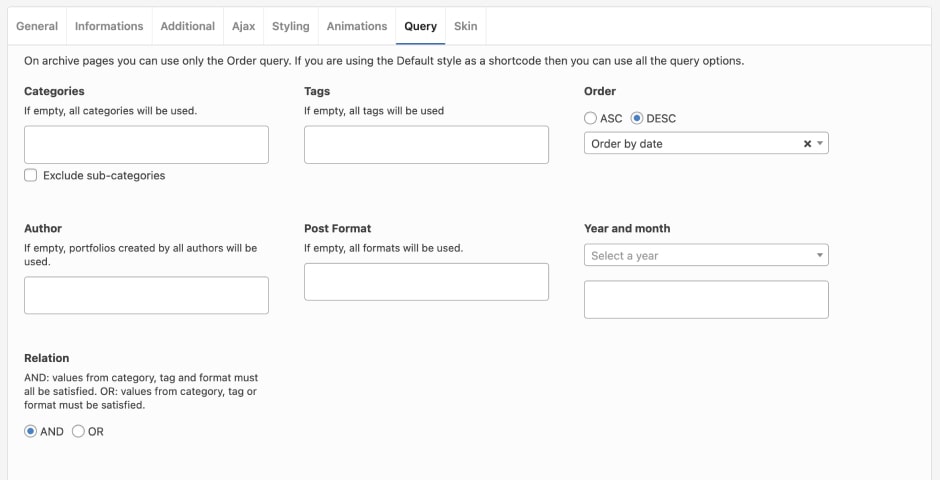
Style Skin
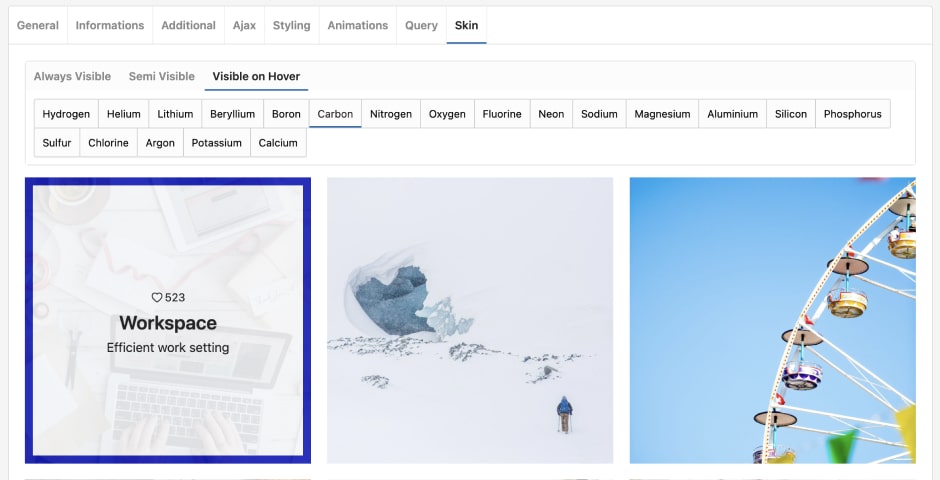
Skin is made from 2 things (types and styles). There are 3 types with 20 styles for each type with total of 60 different skins.
- Type - Types are general and used to categorize styles.
- Style - Individual styles.
Google Fonts
Copy the Google Font Family from https://fonts.google.com and paste in the Advanced Options section for Google Fonts.
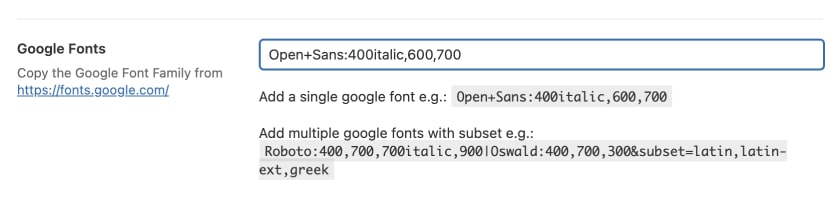
When you've added fonts refresh the page and then you will be able to select it in the fonts dropdown.

Portfolio Item Options
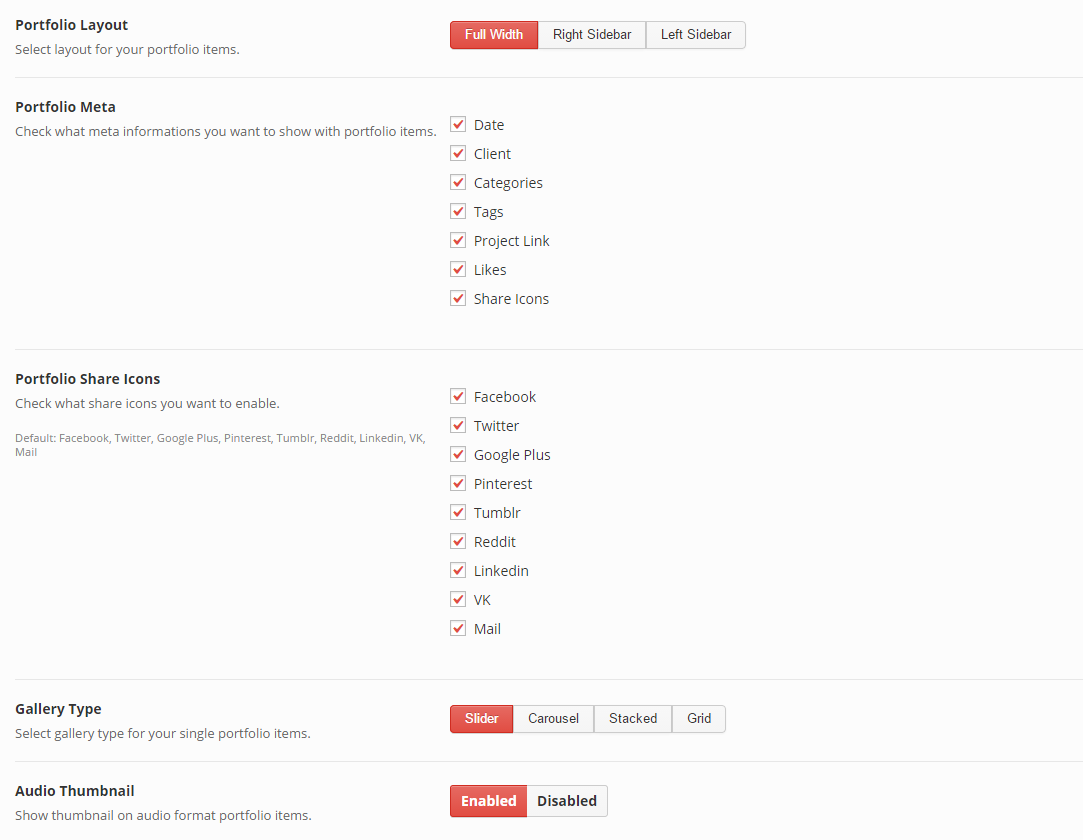
These are global options for your single portfolio items. Several of them can be overriden using custom options that are available for every single portfolio item.
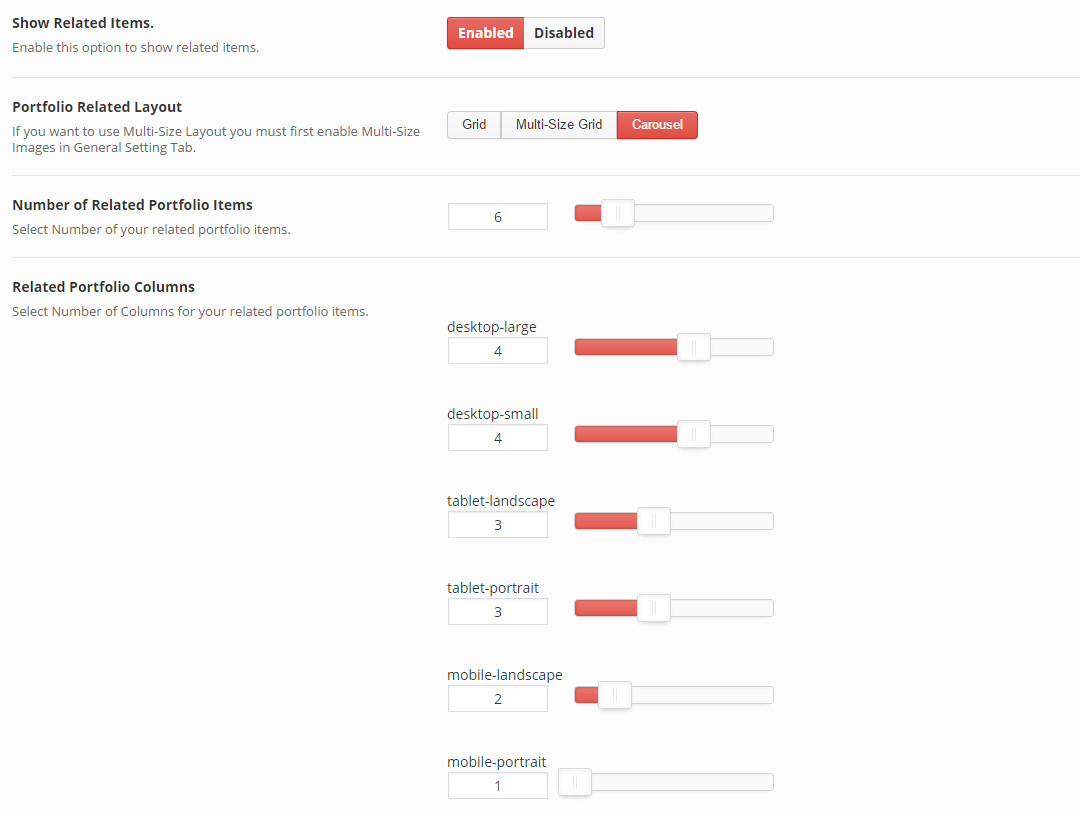
If you choose to enable related items you will have the options to select layout, number of related items and columns for multiple sizes.
Create New Portfolio Item
To create a new portfolio item click "Add New Portfolio". Give your portfolio item title, select format, input categories and tags (tags are optional) and set featured image.
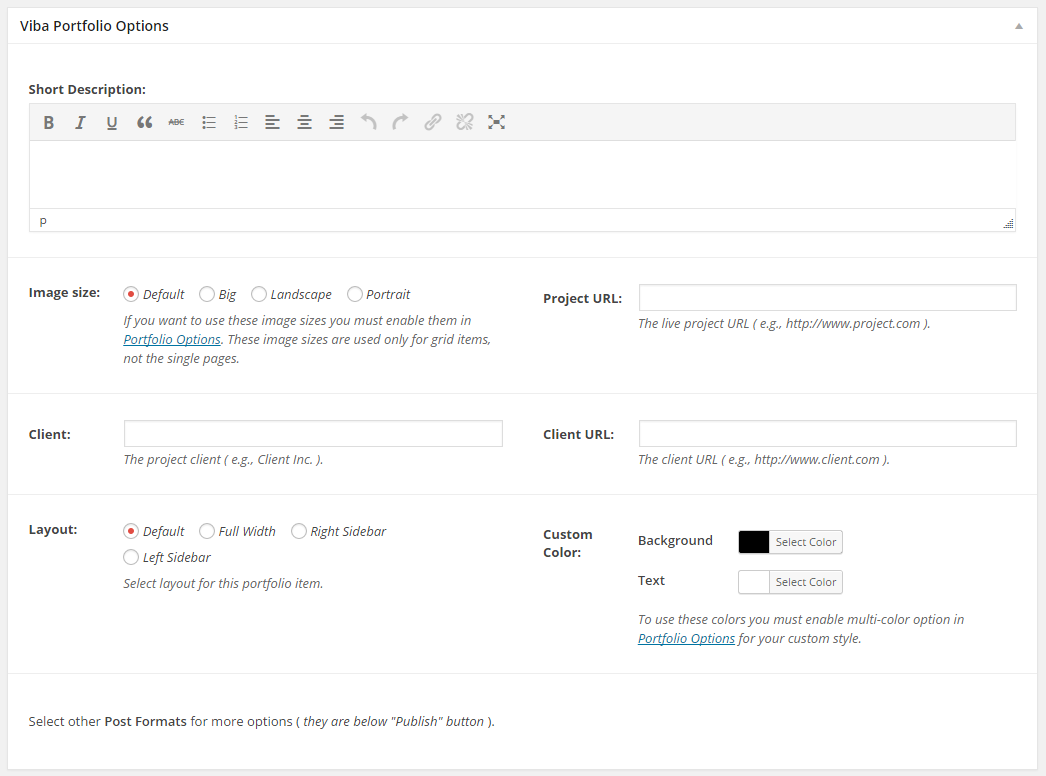
Viba Portfolio gives you custom options for every portfolio item. They are optional. You can leave them all emtpy if you want.
- Short Description - Add description.
- Image Size - Select size for a multi-size grid.
- Project URL - URL for your finished projects.
- Client - Project Client
- Client URL - Projects Client URL
- Layout - Use the default layout or select custom layout for each portfolio item.
- Custom Color - Select color for a multi-color grid.
New Gallery Item
When you select "Gallery Format" new options will be added at the bottom of "Viba Portfolio Options".
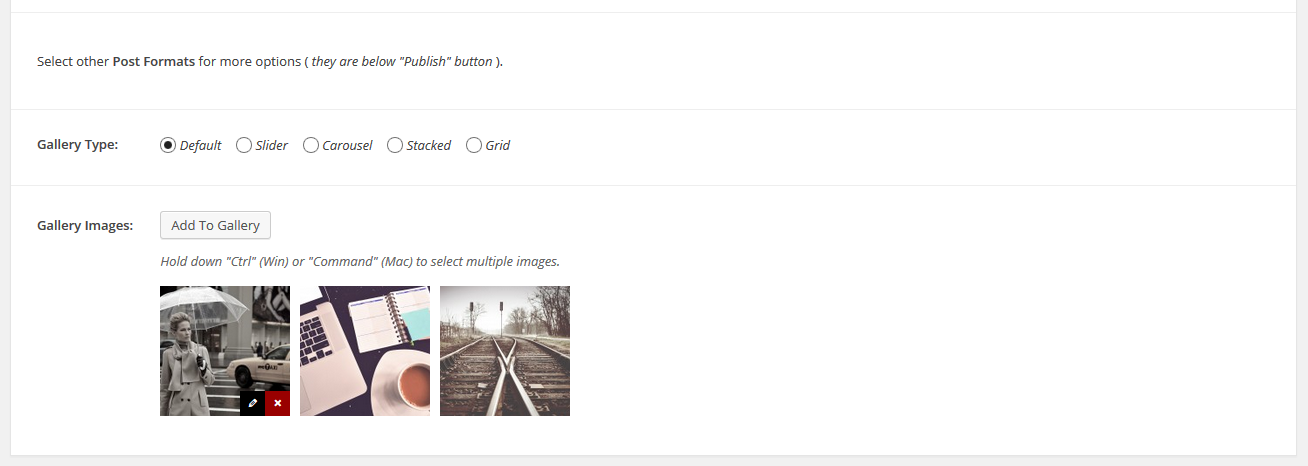
Easy select gallery type for this portfolio item.
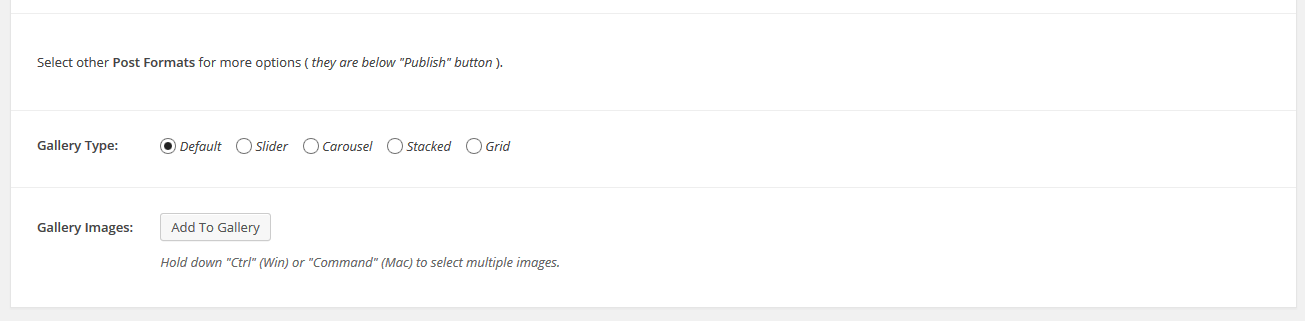
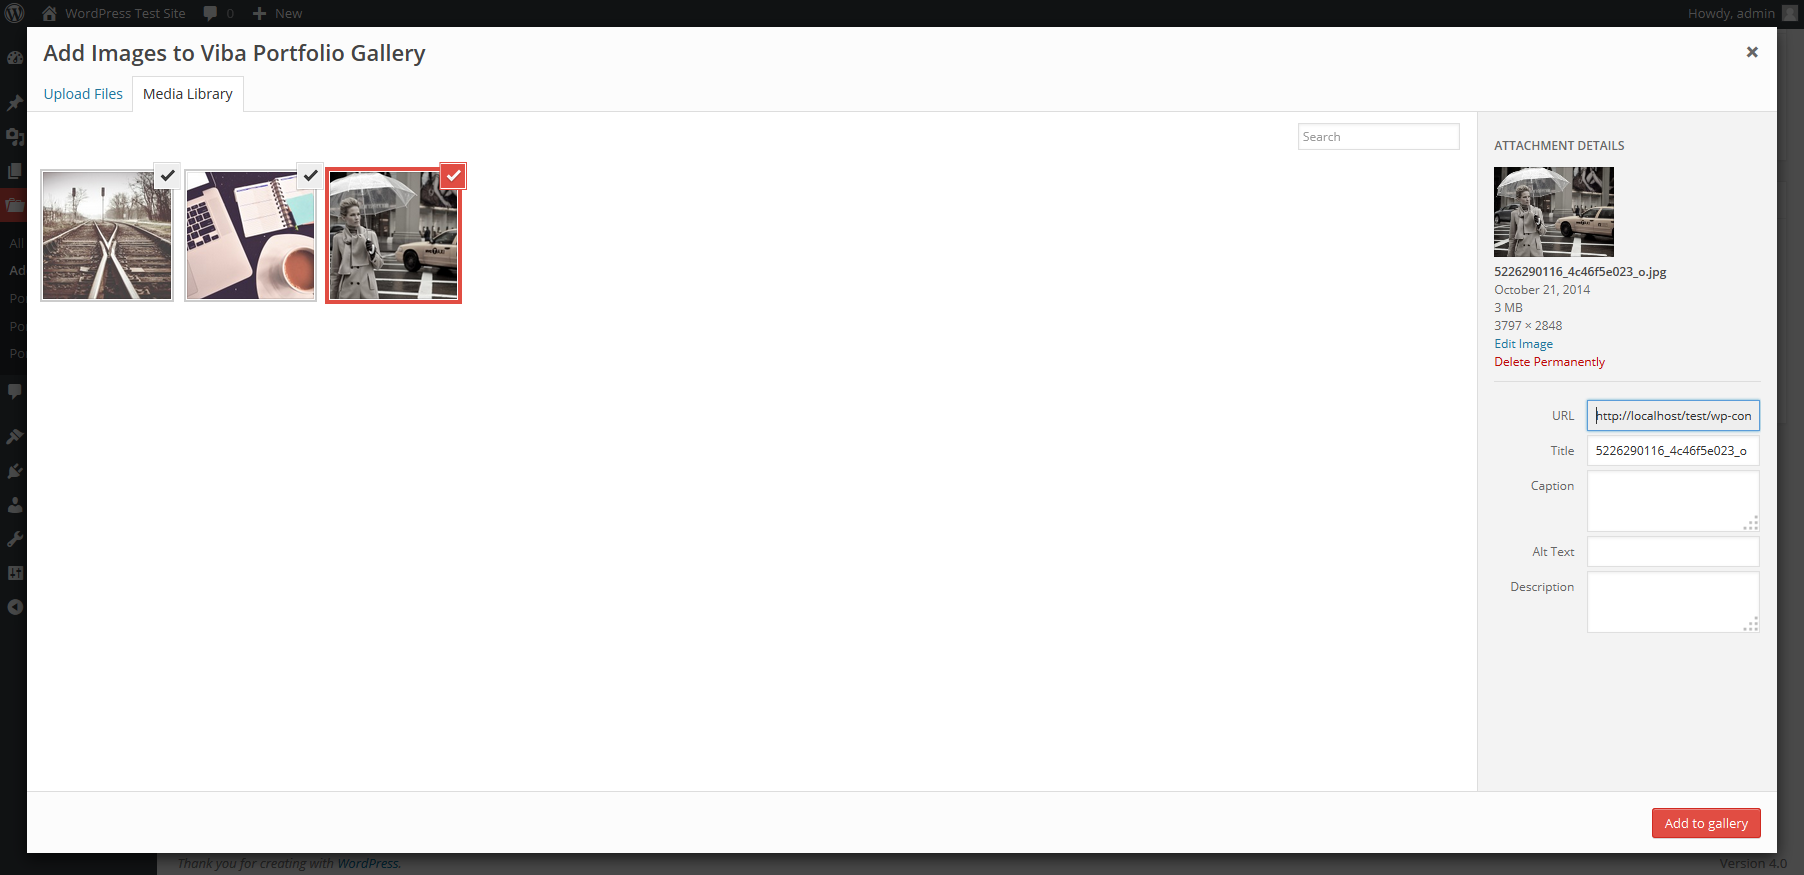
Add new images to gallery. Hold down "Ctrl" (Win) or "Command" (Mac) to select multiple images.
After you have added new images you can remove or edit them. You can also drag images and reorganize them.
New Video Item
When you select "Video Format" new option will be added at the bottom of "Viba Portfolio Options".
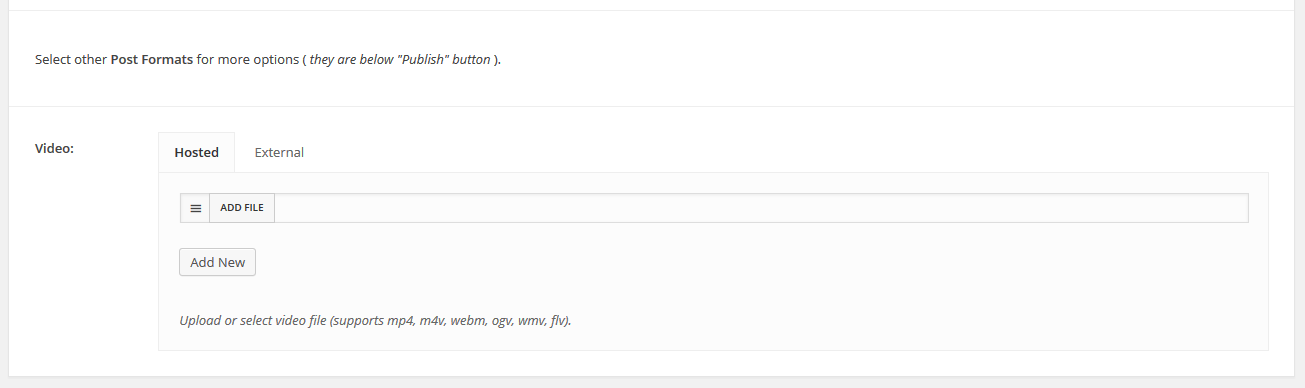
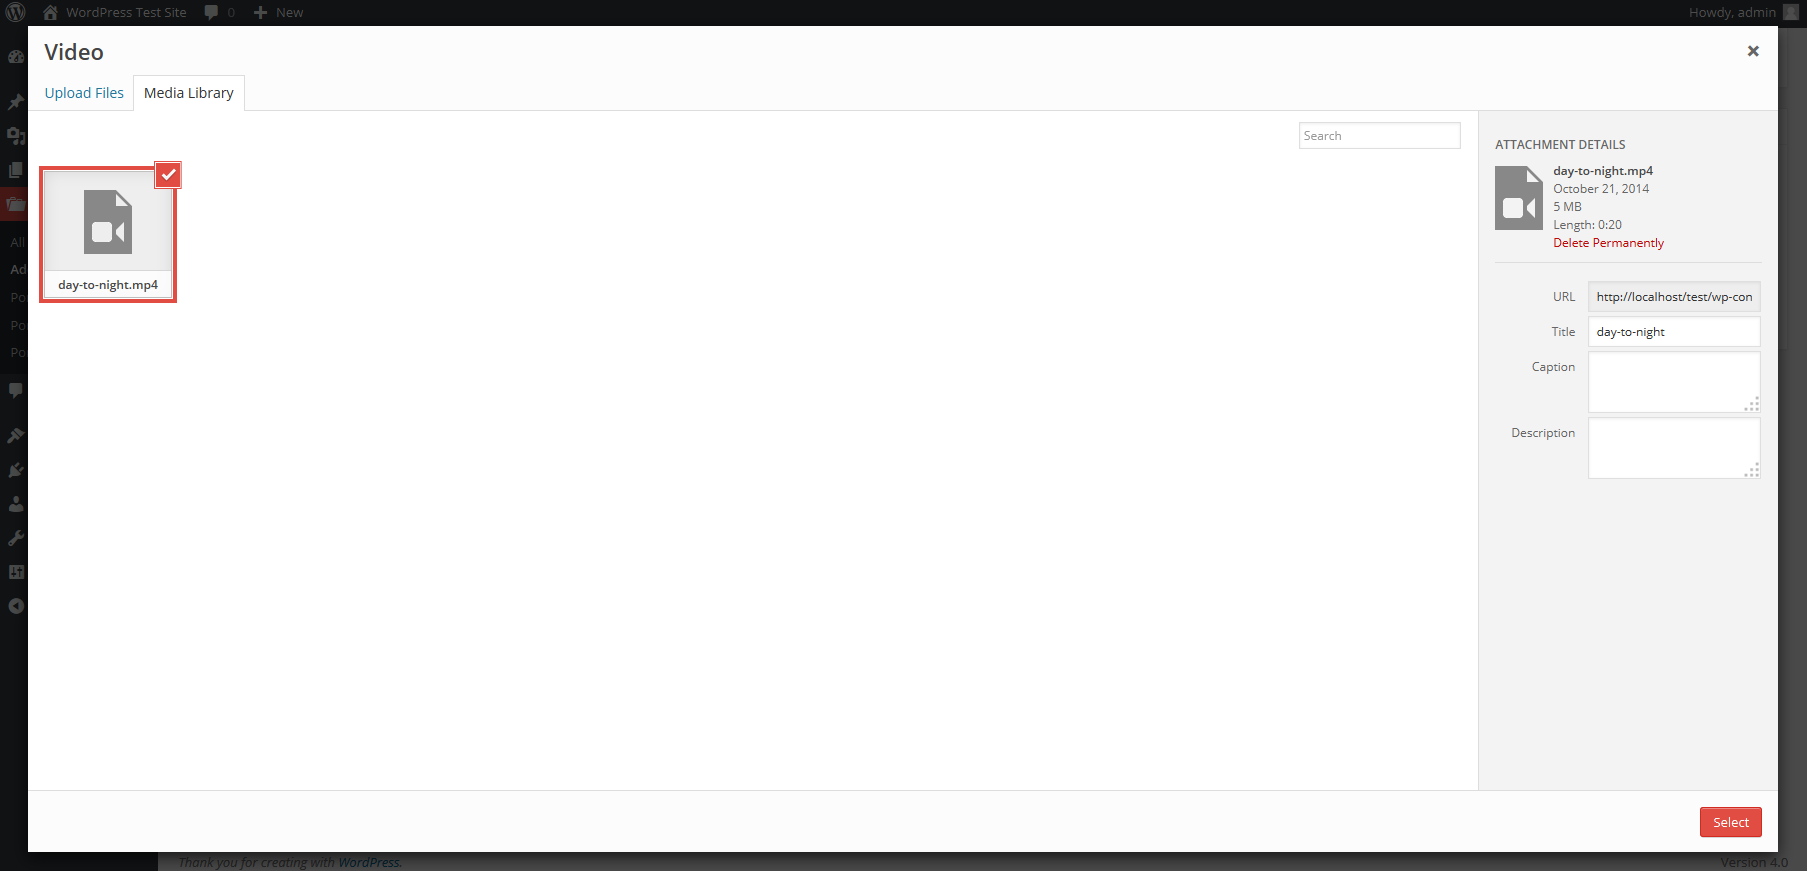
By clicking on "Add File" you will get the dialog where you can upload your video.
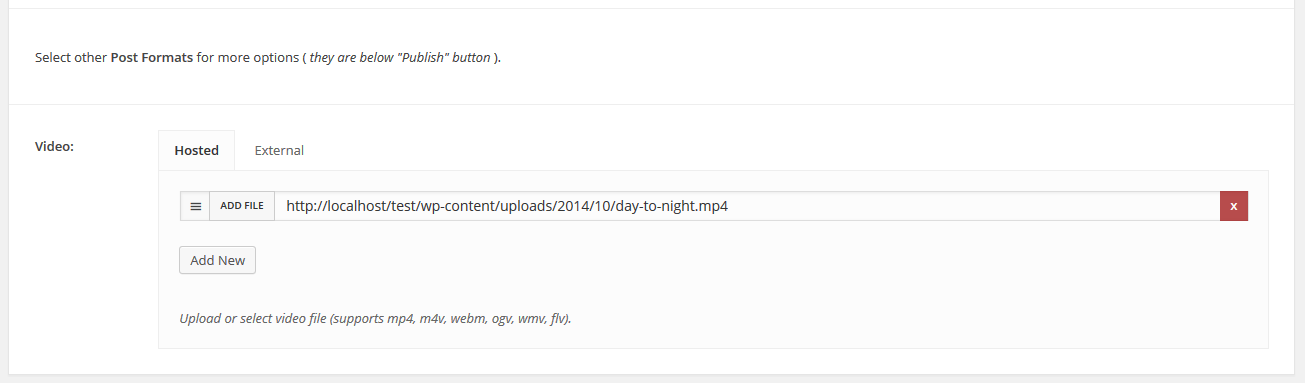
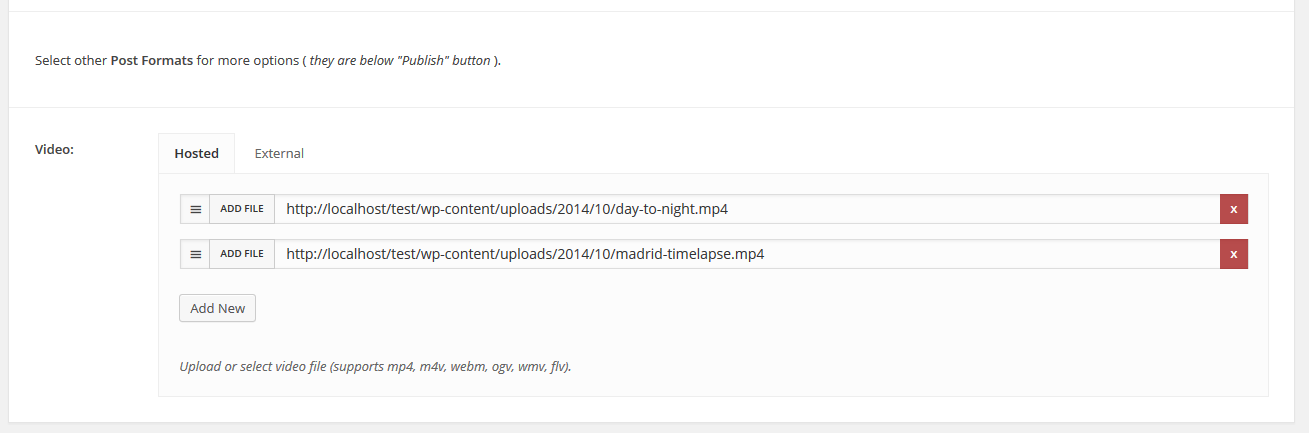
If you want multiple videos just click "Add New" and upload more videos. If you have more videos you can drag and reorganize them.
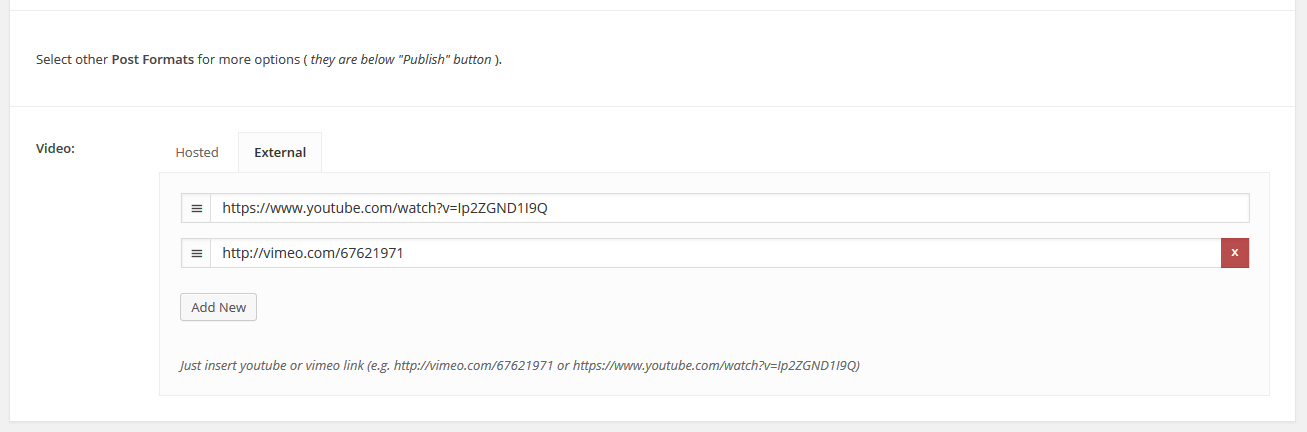
You can also use the youtube and vimeo videos. Just insert the link to the video.
New Audio Item
When you select "Audio Format" new option will be added at the bottom of "Viba Portfolio Options".
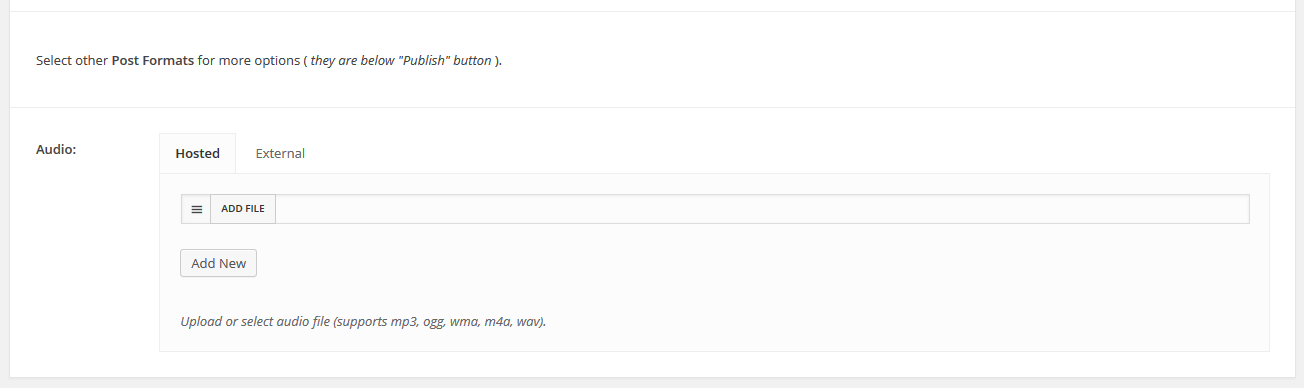
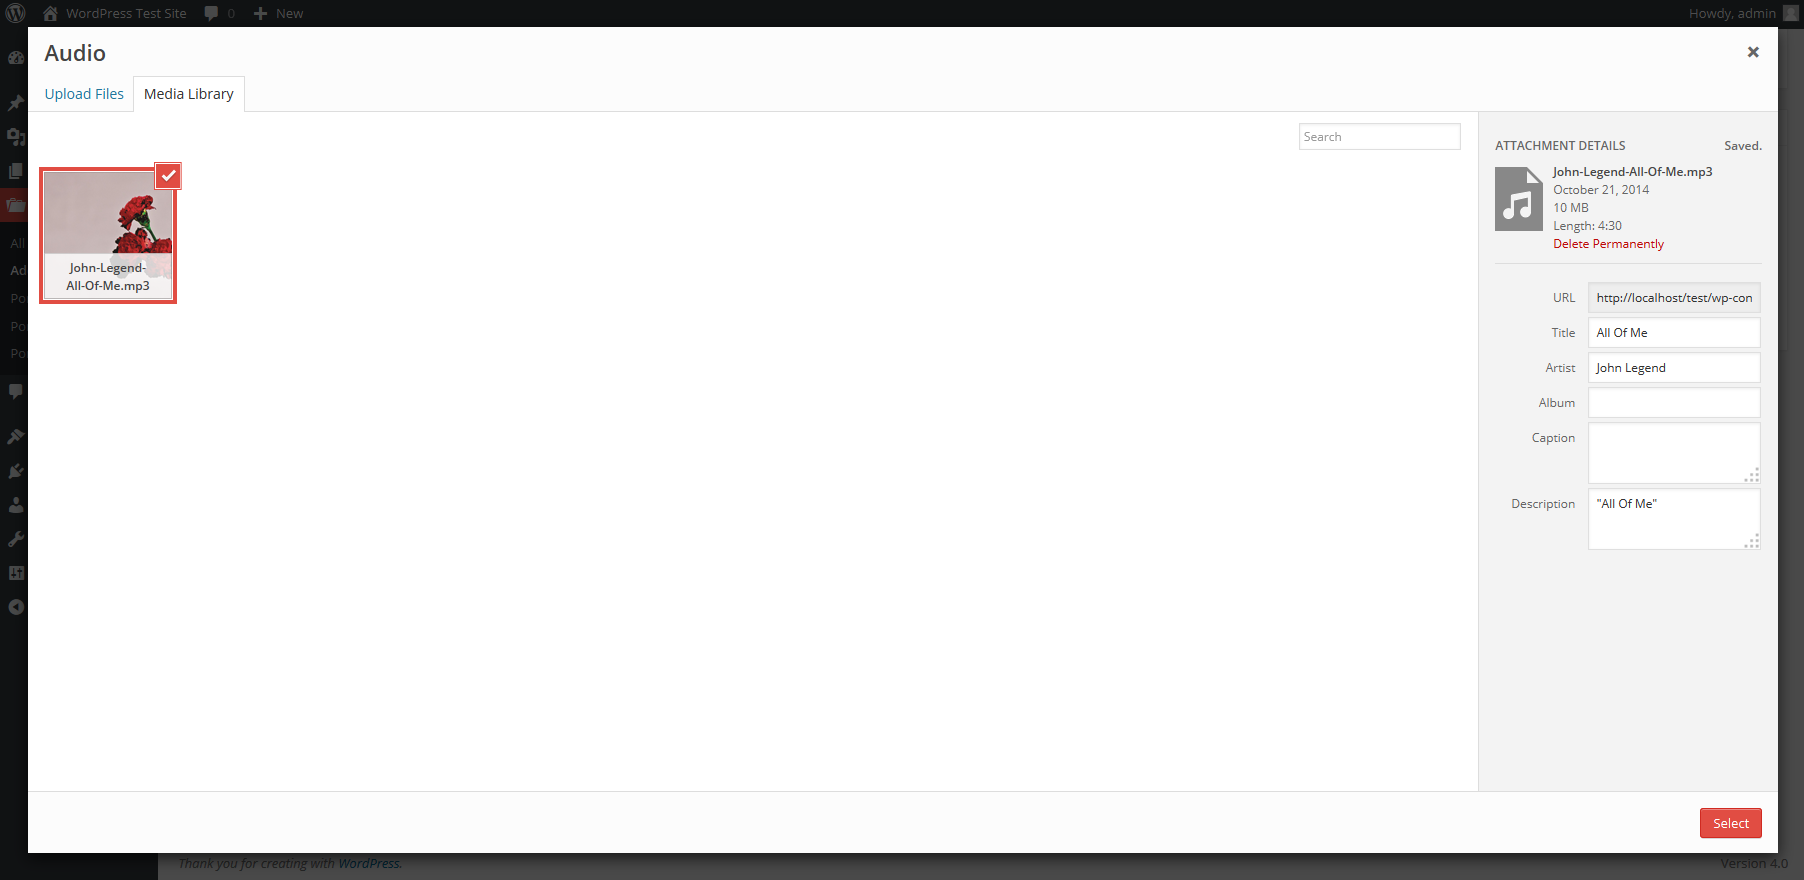
By clicking on "Add File" you will get the dialog where you can upload your audio.
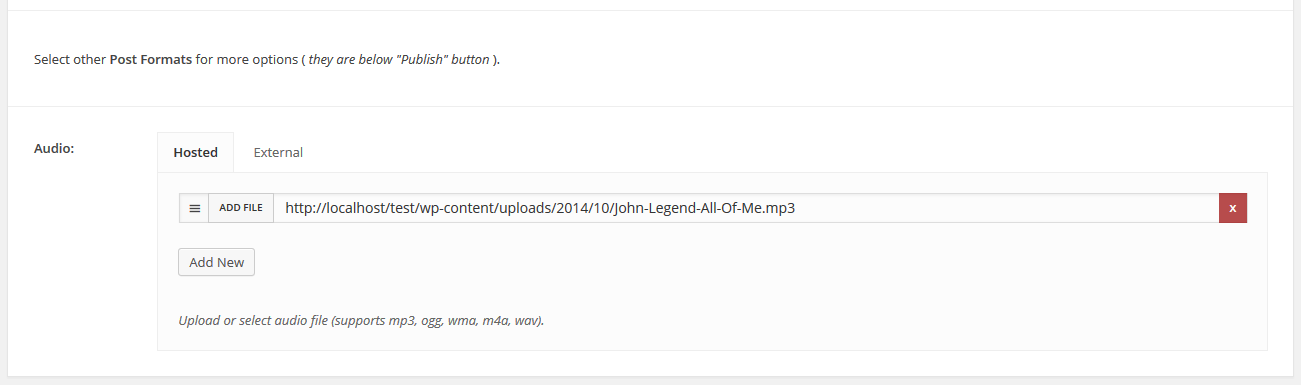
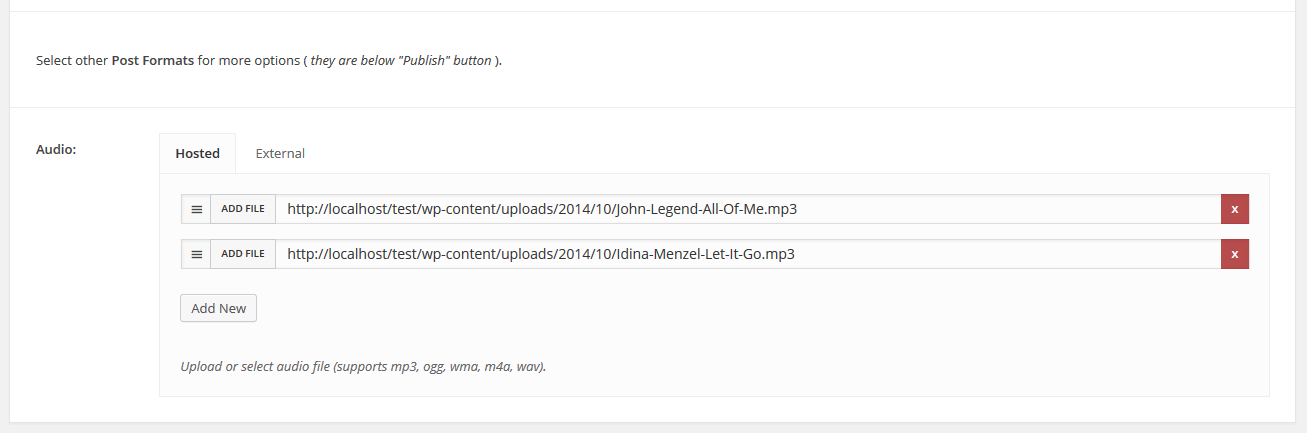
If you want multiple audios just click "Add New" and upload more audios. If you have more audios you can drag and reorganize them.
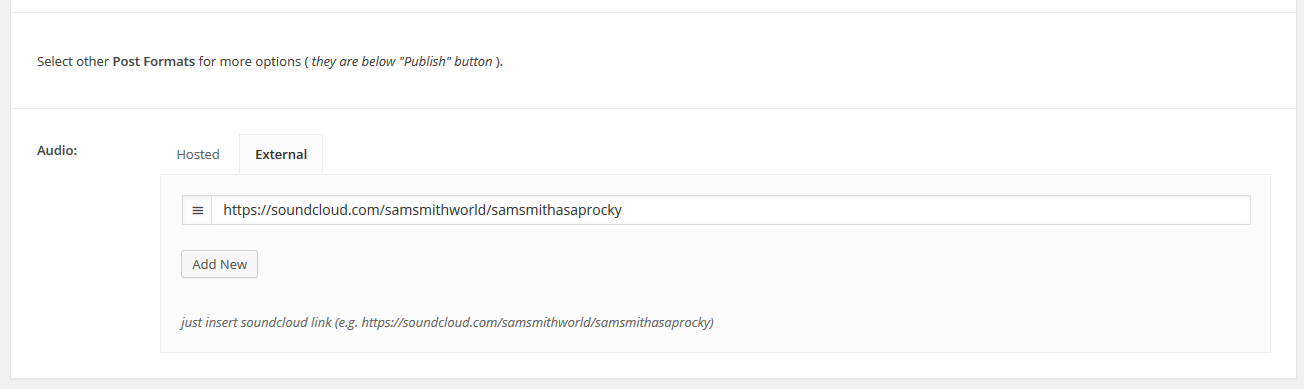
You can also use the soundcloud. Just insert the link to the audio.
New Link Item
When you select "Link Format" new option will be added at the bottom of "Viba Portfolio Options".
If you don't want your item to link to the default page use this option to enter custom URL that the item will link to.

Shorcode
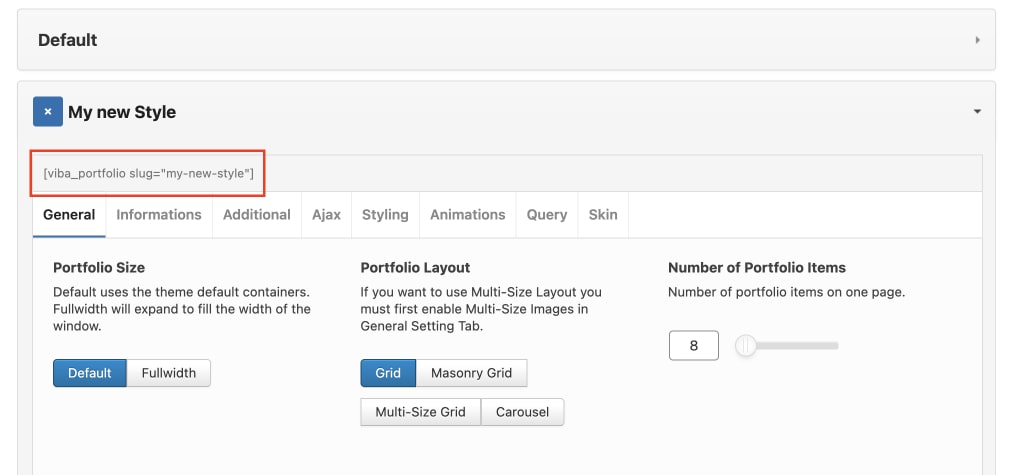
The shortcode for default style is [viba_portfolio]. For every new style you create you can find the shortcode just below the style title.
Gutenberg Block
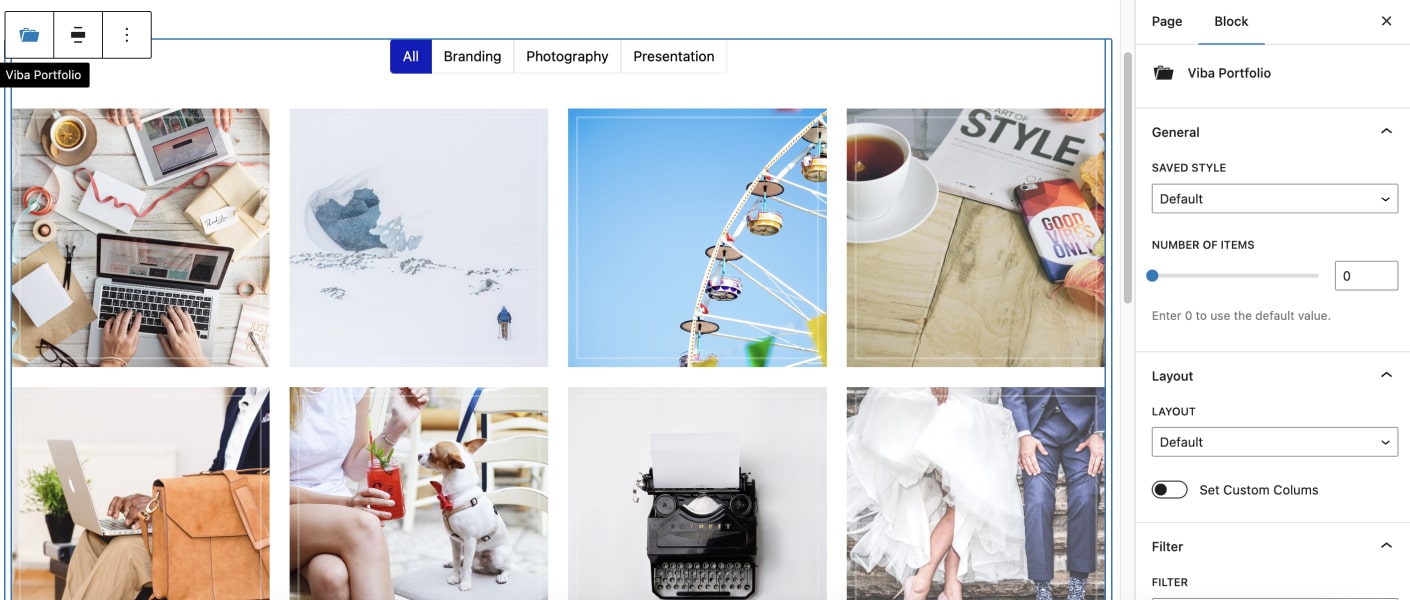
Viba Portfolio has custom block that you can insert into pages.
Elementor Widget
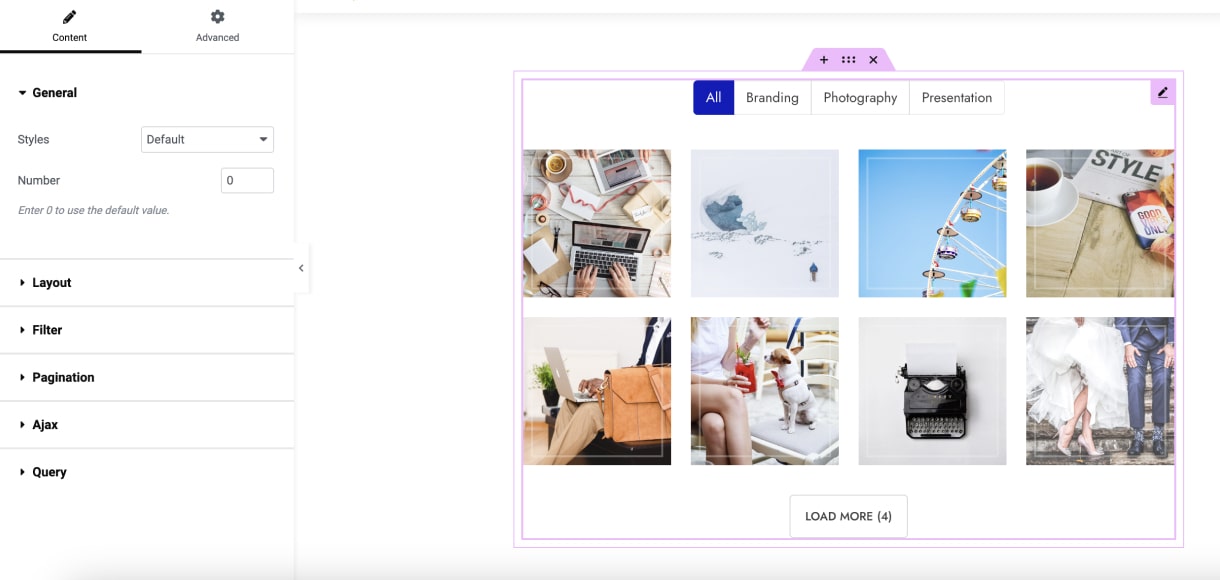
Viba Portfolio has custom Elementor widget that you can insert into pages.
Visual Composer Widget
Viba Portfolio has custom Visual Composer widget that you can insert into pages.
Developers Introduction
Hello Developers. If you have ever used WooCommerce or bbPress you will have no trouble using Viba Portfolio. It is using templating system the same way those plugins do.
The plugin classes and function are nicely structured and grouped so you will easy find your way around it. Also the template files and hooks are structured very similar to WooCommerce. It's done this way to give you something familiar to work with and reduce the adapting time
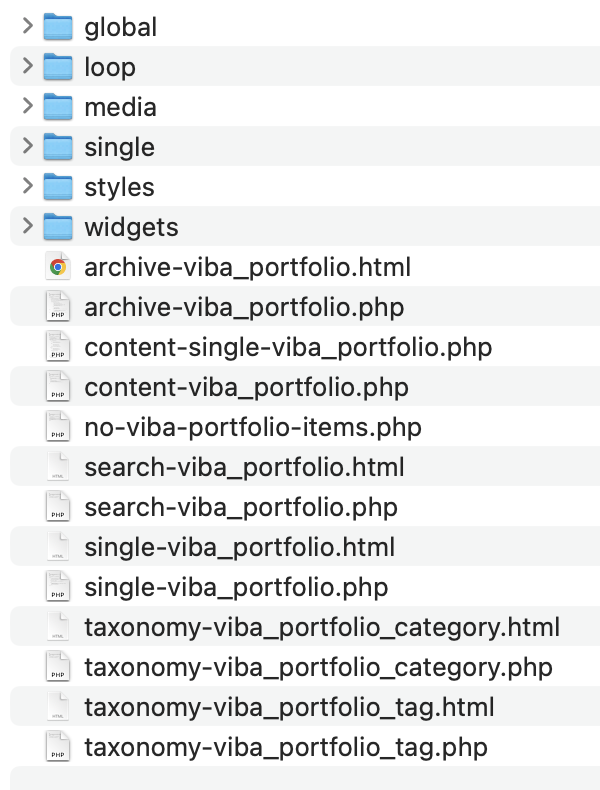
Template files contain many hooks which will allow you to add or move content without having to edit the template files themselves.
If you need to edit some templates you need to copy the templates to your-theme/viba-portfolio/ folder and then edit it there.
If the template is in the folder e.g. single, you need to create that folder e.g. your-theme/viba-portfolio/single/ and then copy the template in that folder.
Theme Integration
Viba Portfolio will integrate nicely out of the box with WordPress default themes. If you want to use Viba Portfolio as a shortcode and use ajax to open your items then everything will work just fine.
The problem might appear when you are using the archives and single pages by breaking your theme layout because the content wrappers do not match your chosen theme.
There are two ways to resolve this:
- Creating the viba-portfolio.php file (easy solution)
- Using hooks (for advanced users/developers)
Creating the viba-portfolio.php file
Duplicate your theme's page.php file, and name it viba-portfolio.php. It should be in the same directory as the page.php.
Edit the new file viba-portfolio.php by deleting the loop and replacing the_content() with viba_portfolio_content(). All other unnecessary stuff can be deleted too. However the wrappers used to wrap the_content() need to stay.
Some themes might use get_template_part( 'content', 'page' ); instead of the_content(). Delete that part and go into content-page.php and look for the the_content() and the wrappers that are used to wrap it and copy it in place it where the get_template_part( 'content', 'page' ); was.
Using hooks
Just like when creating the viba-portfolio.php we need to look inside page.php to see what markup is the theme using. Insert this few lines in your theme's functions.php file.
First unhook the default wrappers.
remove_action( 'viba_portfolio_before_main_content', 'viba_portfolio_content_wrapper', 10 );
remove_action( 'viba_portfolio_after_main_content', 'viba_portfolio_content_wrapper_end', 10 );
Then hook your own functions with your theme wrappers.
add_action( 'viba_portfolio_before_main_content', 'my_theme_content_wrapper', 10 );
add_action( 'viba_portfolio_after_main_content', 'my_theme_content_wrapper_end', 10 );

function my_theme_content_wrapper() { ?>
  <div id="primary" class="content-area">
        <div id="content" class="site-content" role="main">
            <article id="post-<?php the_ID(); ?>" <?php post_class(); ?>>
                <div class="entry-content">
<?php
}

function my_theme_content_wrapper_end() { ?>
  				</div><!-- .entry-content -->
            </article><!-- #post -->
        </div><!-- #content -->
    </div><!-- #primary -->
    <?php get_sidebar();
}
Add New Types and Styles
Before going further let us repeat, as noted before in documentation, skin is made from 2 things (types and styles). There are 3 types with 20 styles for each type with total of 60 different styles.
- Type - Types are general and used to categorize styles.
- Style - Individual styles.
Add new styles to already available types
Types have their predefined ids.
- Always Visible - vp-always-visible
- Semi Visible - vp-semi-visible
- Visible On Hover - vp-visible-on-hover
function my_new_styles( $styles ) {

	// add a new style to Always Visible Type
	$styles['vp-always-visible']['styles'][] = array(
		'title' => __( 'Style 1', 'my-textdomain' ),
		'id' => 'my-prefix-style-1',
	);

	// add a new style to Semi Visible Type
	$styles['vp-semi-visible']['styles'][] = array(
		'title' => __( 'Style 2', 'my-textdomain' ),
		'id' => 'my-prefix-style-2',
	);

	// add a new style to Visible on Hover Type
	$styles['vp-visible-on-hover']['styles'][] = array(
		'title' => __( 'Style 3', 'my-textdomain' ),
		'id' => 'my-prefix-style-3',
	);

	return $styles;

}
add_filter( 'viba_portfolio_template_styles', 'my_new_styles' );
Add a new type and styles
function my_new_type_and_styles( $styles ) {

	$styles['my-new-type'] = array(
		'title' => __( 'My New Type', 'my-textdomain' ),
		'styles' => array(
			array(
				'title' => __( 'Style 1', 'my-textdomain' ),
				'id' => 'my-prefix-style-1',
			),
			array(
				'title' => __( 'Style 2', 'my-textdomain' ),
				'id' => 'my-prefix-style-2',
			),
			array(
				'title' => __( 'Style 3', 'my-textdomain' ),
				'id' => 'my-prefix-style-3',
			)
		)
	);

	return $styles;

}
add_filter( 'viba_portfolio_template_styles', 'my_new_type_and_styles' );
Style your new type and styles with CSS
Remeber the id you used to create your new style. Let's take for example our new type (my-new-type) and style (my-prefix-style-1).
.my-prefix-style-1 .viba-portfolio-item {
	background: #000;
}
You could also add the type.
.my-new-type.my-prefix-style-1 .viba-portfolio-item {
	background: #000;
}
If we wanted to style the first example.
.vp-always-visible.my-prefix-style-1 .viba-portfolio-item {
	background: #000;
}
.vp-semi-visible.my-prefix-style-2 .viba-portfolio-item {
	background: #000;
}
.vp-visible-on-hover.my-prefix-style-3 .viba-portfolio-item {
	background: #000;
}
Add Templates
If you go to templates/styles/ folder you will see files below.
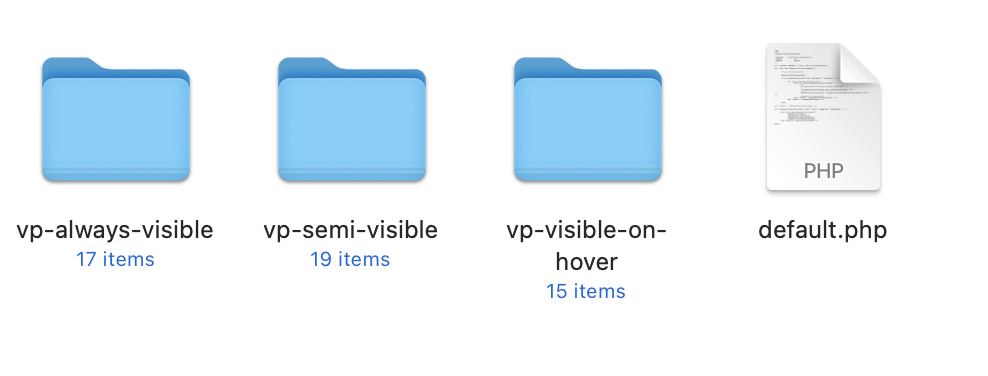
If you go into vp-visible-on-hover you will see files below.
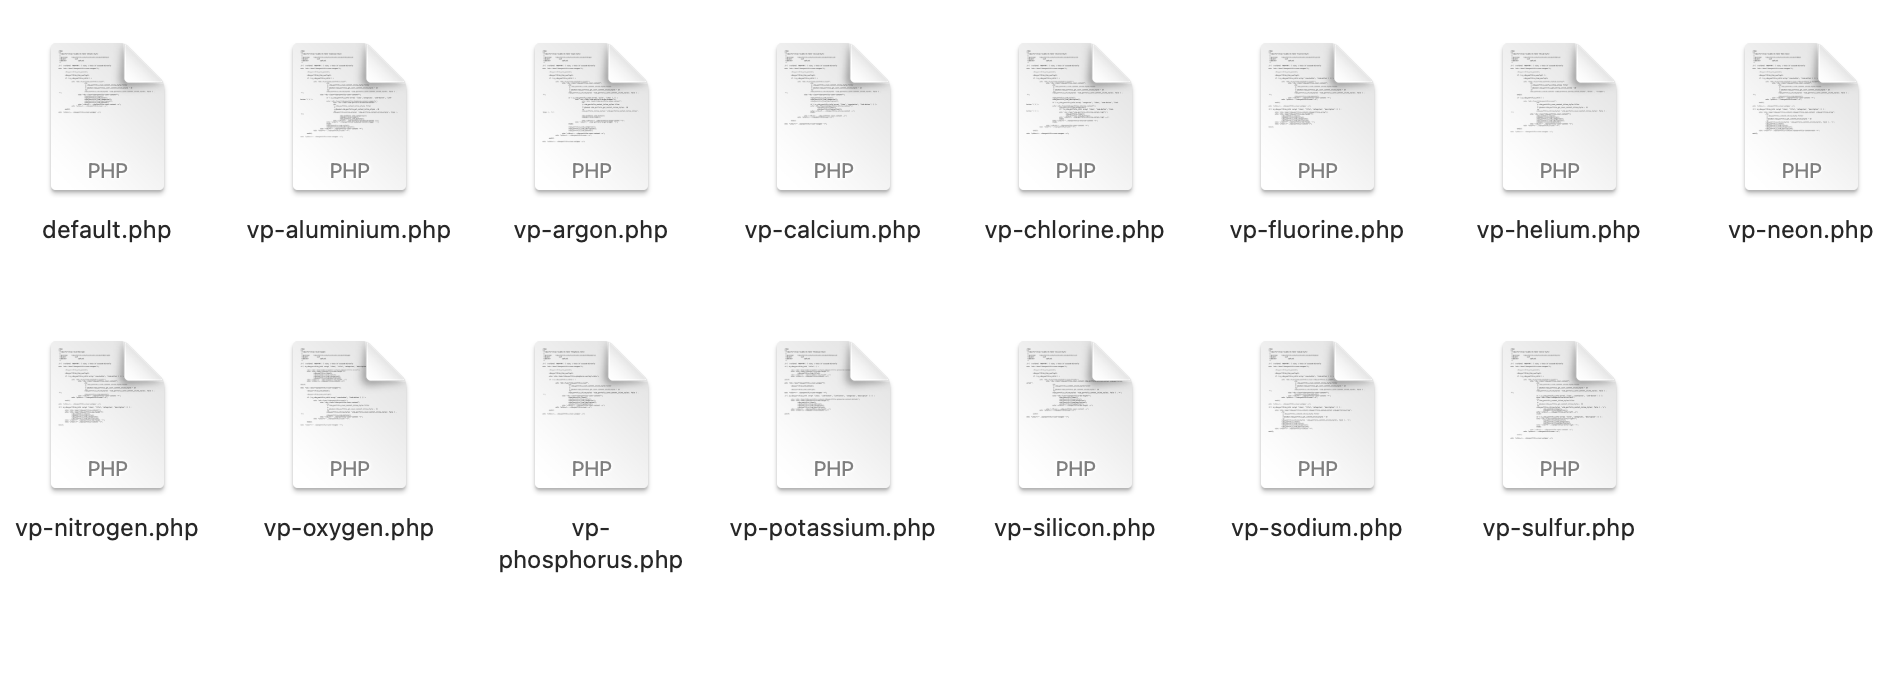
Note that not all styles have their templates. It's not neccessary that style has its own template file. If the template file for the style isn't available it will load the default.php
Order in which files are being loaded. If the file isn't available it is looking for the next in order.
- your-theme/viba-portfolio/styles/{$type}/{$style}.php"
- your-theme/viba-portfolio/styles/{$type}/default.php"
- your-theme/viba-portfolio/styles/default.php"
- styles/{$type}/{$style}.php" - plugin templates folder
- styles/{$type}/default.php" - plugin templates folder
- styles/default.php" - plugin templates folder
Please note that you can copy the existing style to your-theme/viba-portfolio/styles/ and edit it there. It will override the plugin file. If you look at the order it's looking in your theme folder first.
After we have added our new types and styles we can create templates for them.
First create in your theme folder a new your-theme/viba-portfolio/styles/ folder if it isn't created already.
For the first example where we create new style for existing types you will need to create new folders with files.
- vp-always-visible/my-prefix-style-1.php
- vp-semi-visible/my-prefix-style-2.php
- vp-visible-on-hover/my-prefix-style-3.php
For the second example where we have created our new type with styles create folder and files like this.
- my-new-type/my-prefix-style-1.php
- my-new-type/my-prefix-style-2.php
- my-new-type/my-prefix-style-3.php
Generated CSS
Functions that are used to generate the custom CSS are in includes/viba-portfolio-styles-functions.php. The custom CSS file is created in WordPress wp-content/uploads/viba-portfolio/ folder. If you have selected some other folder to be your upload folder than it will be created there.
Only when you save the options in admin panel new CSS is created. If you don't have rights to save files the css will be printed in the head tag.
Custom CSS is generated from 8 different parts:
- global - global css used for item colors and overlay opacity
- animation - animation duration
- padding/margin - used to add padding and margins to grid and items
- loader - spinner styles
- filter - filter styles
- pagination - pagination styles
- typography - typography stlyes
- styles - custom style css
How to use WordPress hooks to customize generated CSS.
Viba Portfolio has 8 different filters what you can use to hook your own styles.
- hook_name - parameters
- viba_portfolio_global_css - $css, $slug, $overlay_color, $info_color, $opacity
- viba_portfolio_animation_css - $css, $slug, $animation_duration
- viba_portfolio_padding_margin_css - $css, $slug, $padding, $margins
- viba_portfolio_loader_css - $css, $slug, $spinner_color
- viba_portfolio_filter_css - $css, $slug, $filter_color, $info_color
- viba_portfolio_pagination_css - $css, slug, $pagination_color, $info_color
- viba_portfolio_typography_css - $css, $slug, $typography
- viba_portfolio_styles_css - $styles, $slug, $overlay_color, $info_color, $opacity
Pagination and filter CSS is generated only if the pagination or filter is enabled.
Let's say we want to change the pagination css. There are 2 ways we can do that.
- replace the old paginatin css
- add our new css to the old pagination css
You need to add the prefix .vp-style-{$slug} to every CSS line you write. This way users can have multiple styles with different settings and this is way the generated CSS will be applied only to that style.
Replace the old CSS
function my_pagination_css( $css, $slug, $pagination_color, $info_color ) {
	$css = "
	.vp-style-{$slug} .vp-load-more { background-color: {$pagination_color['background']}; }
	";

	return $css;

}
add_filter( 'viba_portfolio_pagination_css', 'my_pagination_css', 10, 4 );
This will generate this CSS.
.vp-style-default .vp-load-more { background-color: #265e6e; }
The .vp-style-default class is generated because this CSS is taken from the Default Style.
Add our new CSS to the old CSS
function my_pagination_css( $css, $slug, $pagination_color, $info_color ) {
	$css[] = "
	.vp-style-{$slug} .vp-load-more { background-color: {$pagination_color['background']}; }
	";

	return $css;

}
add_filter( 'viba_portfolio_pagination_css', 'my_pagination_css', 10, 4 );
This will generate this CSS.
.vp-style-default .vp-pagination-numbers ul.page-numbers a.page-numbers:hover,
.vp-style-default .vp-pagination-numbers ul.page-numbers .page-numbers.current,
.vp-style-default .vp-pagination-arrow a:hover,
.vp-style-default .vp-load-more:hover { background-color: #265e6e; border-color: #265e6e; color: #fff; }

.vp-style-default .vp-load-more { background-color: #265e6e; }
The only difference between them are the $css[] brackets. Without brackets it replaces the old CSS. With brackets it adds new CSS to the old CSS.
It's the same logic for other filters, you need to change the parameters and the last number in when you add filter, e.g. add_filter( 'viba_portfolio_pagination_css', 'my_pagination_css', 10, 4 );. 10 is the priority and 4 is the number of parameters the function is using.
For example the viba_portfolio_animation_css is using only 3 parameters so you would do that like this.
function my_animation_css( $css, $slug, $animation_duration ) {
	$css[] = "
	.vp-style-{$slug}.js-vp-loaded .viba-portfolio-item {
		-webkit-animation-duration: {$animation_duration}ms;
		animation-duration: {$animation_duration}ms;
	}
	";

	return $css;

}
add_filter( 'viba_portfolio_animation_css', 'my_animation_css', 10, 3 );
viba_portfolio_styles_css filter is a little bit different from others
This is a custom CSS that will be loaded only when the style is selected. For example if the Style 1 with an id of my-prefix-style-1 (that we have created here) is selected only that CSS will be loaded.
function my_custom_style_css( $styles, $slug, $overlay_color, $info_color, $opacity ) {

	$styles['my-prefix-style-1'] = "
	/* Custom style 1*/
	.vp-style-{$slug} .my-prefix-style-1 .viba-portfolio-item {
		background-color: {$overlay_color['background']};
		color: {$overlay_color['text']}
	}
	";

	$styles['my-prefix-style-2'] = "
	/* Custom style 2*/
	.vp-style-{$slug} .my-prefix-style-2.vp-visible-on-hover .viba-portfolio-item-inner {
		box-shadow: 0 0 0 0 {$info_color['background']};
	}
	.vp-style-{$slug} .my-prefix-style-2.vp-visible-on-hover .viba-portfolio-item-inner:hover {
		box-shadow: 0 0 0 10px {$info_color['background']};
		opacity: {$opacity};
	}
	";

	$styles['my-prefix-style-3'] = "
	/* Custom style 3*/
	.vp-style-{$slug} .my-prefix-style-3 .viba-portfolio-item {
		background-color: {$overlay_color['background']};
		color: {$overlay_color['text']}
	}
	.vp-style-{$slug} .my-prefix-style-3 .viba-portfolio-cover-content {
		color: {$info_color['text']};
	}
	";

	return $styles;
}
add_filter( 'viba_portfolio_styles_css', 'my_custom_style_css', 10, 5 );
Javascript
Viba Portfolio has 2 hooks where you can hook your javascript code and execute some code things.
- afterLoadMore
- afterOpenWithAjax
You need to extend the default viba_portfolio object with your new things and they will be called on those events.
var extend_viba_portfolio = {
    afterLoadMore : function() {
        viba_portfolio_hoverdirections();
        viba_portfolio_max_height();
        viba_portfolio_on_resize();
        my_init_function();
        alert( 'hello' );
    },
    afterOpenWithAjax : function() {
        viba_portfolio_single_media();
        viba_portfolio_mediaelement();
        my_init_function();
        alert( 'hello' );
    }
};
jQuery( document ).ready( function( $ ) {
    $.extend( viba_portfolio, extend_viba_portfolio );
});
There is also a way for you to completely change the default function. You just copy the name of the function and make sure to laod it before Viba Portfolio main.js.
E.g. here we are modifying the like function.
function viba_portfolio_likes(){
    jQuery( document ).on( 'click.viba_portfolio', '.viba-portfolio-likes', function( event ) {
        event.preventDefault();
        alert ( 'hello' );
    });
}